The Robot Mouse

One of Tabby’s most favorite gifts from her birthday was the robot mouse Matt got for her, or rather the robot mouse KIT. It had to be built, soldered together. One night after Ben had gone to bed and I was otherwise occupied, Matt and Tabby built this little guy together. As she has excellent fine motor skills, she held the solder while Matt held the iron. I wish I had seen (and been able to take photos!) of them working together, but I’m glad they had their special time together.

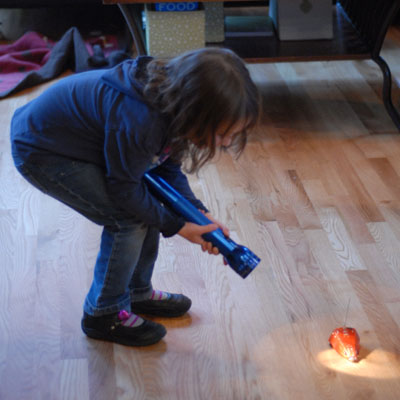
The cool thing is that when it’s done, it chases the brightest light in the room. It works best in relative darkness, but you can use a flashlight to lead it around the room. It is fun to play with and both kids are getting a big kick out of it.

Water Color Resistance

One of the things we got Tabby for Christmas was a nicer set of watercolors … not extravagantly nice, but a good student-grade set. I’d read an article at some point in time about getting kids GOOD art supplies with the reasoning that it is more fun with them if the outcome is better and predictable. One specific example they cited was water colors and it hit home with me because I remember smashing my brush into those solid water colors you get in art class, trying and trying to get vivid colors and barely coming up with anything darker than dishwater. Grrrrr …

Since she got them we’ve used them a few times. They are definitely fun to play with and produce everything from nice vivid colors to beautifully pale colors depending on how much water you add. Anyhow, as is our tradition, following birthdays, we write thank you notes to those who sent gifts. We generally skate by on the notes for those who were present, though with some people, like my Grandma, Tabby wanted to write a note anyhow, so we did. Gratitude should never be discouraged, right?

The standard format is to cut 8.5×11″ cardstock in half and then fold the halves to make quarter-page sized notes. We have a box of envelopes that will probably last until the kids are in their teens that neatly hold this size card. Then we decorate. We’ve done everything from Tabby coloring printed images of Tinkerbell and Minnie mouse to thumbprint cards to stickers. And this year, I proposed we do water colors. I sent Tabby away and then I wrote THANK YOU! on a card with a white crayon and then brought her back in told her to water color the heck out of it. She did so and was delighted to see my written message appear. After that she directed what we write on the cards and requested “fancy writing” on the next one.

At some point in time, Ben came in and wanted to get in on the action, so I drew him a ton of sqiggles on a half page and he went at it in his 2-year-old way, mixing colors with abandon and cross-contaminating our paints. The result (below) was rather beautiful, but I had to get him out of there (Maaaaaatt!) so we could finish. He was about done anyhow.

Tabby decided she loved the squiggles so much that she had to do her own card with them. It was one of her favorites.

I loved doing this project with the kids and one of the things that I loved best about it was that just before we started, they’d been watching TV (something we don’t often allow in the evenings). Tabby instantly abandoned the TV when she heard we were going to create and Ben followed shortly after. Tabby cannot wait to watercolor again. She wants to play with some other techniques I mentioned like putting salt on the damp watercolors and blotting them with textured things. I look forward to it too.

Bottle Cap Photo Magnets

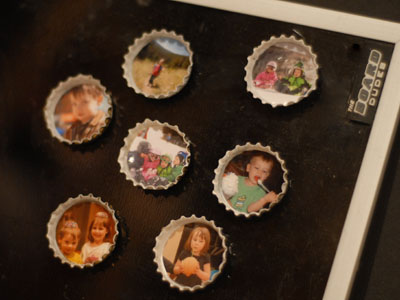
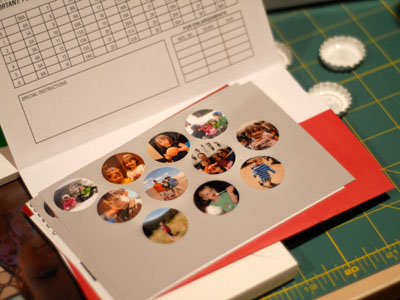
As a fun little project for this week (shoved into the later hours of Monday night!) I made some bottle cap magnets. They were super simple and had great results. Earlier in the day, I’d picked a few photos and cropped them into 1″ circles and put them all on a 4×6″ image and then had them printed at Target ($0.19/ea).

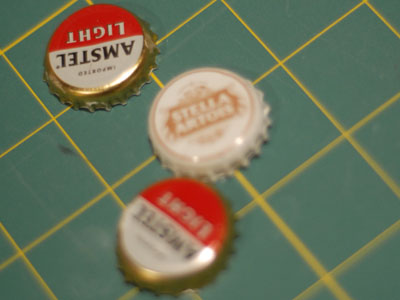
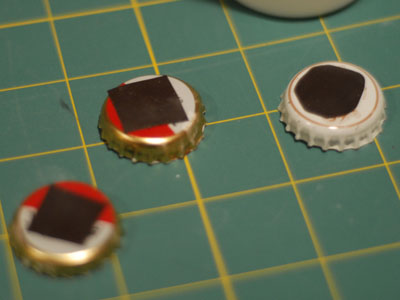
So with the photo settled, I prepped the caps. I tried to take out the liners, but they were difficult/impossible to take out entirely and I’m not absolutely sure this step was necessary. I ended up shredding my finger with the pointy tool I was using for this. Tons of fun.

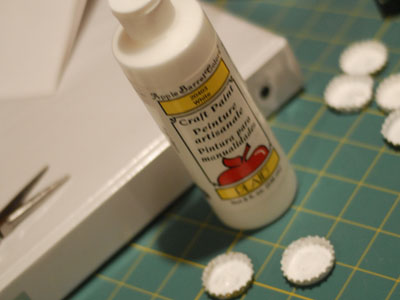
Then they got a quick coat of white craft paint.

While they were drying, I took the opportunity to put some sticky-backed magnets on the back of the caps. If I did this again it might be worth it to invest in a 1″ circle punch for neater results, but this works well enough.

And I cut out the little photo circles.

After that all there was left to do was glue them into the bottle caps. I used a bit of 3M Maximum Strength adhesive, but many things, like Gorilla Glue or E3000 would work just as well.

I am very happy with how they turned out! They will look very cute on the fridge or wherever they end up.

Nannersp
Make sure to check out the other Pinteractive Posts on Nannette’s website.

Fridge Pen Can

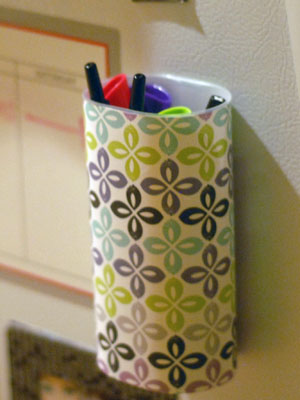
Since we got the new fridge, I’ve been trying to keep it nice and neat and use it for organizing our household. I got a slick Martha Stewart stick-on white-board style weekly calendar to put our schedule and menu on. Looks nice, but the dry-erase markers I’ve got were always going missing, along with my other kitchen pens. Inspired by this pin, I made a nice little decorative can that lives on the fridge and holds our pens.

Mine is made from an old Crystal-light container one from the sticks that you use to make a whole pitcher of the stuff (we make it when camping). Anyhow, it’s oval-shaped and has a couple inches of flat on the back, which I think would be important for getting as much magnetized surface area as possible. Here’s how I went about it: Continue reading “Fridge Pen Can”

Bead Bowls

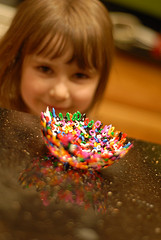
So bloggy bud Nannette challenged everyone to stop pinning and start making. OK, well not STOP pinning. That would be crazy, but to definitely start MAKING in her Pinteractive challenge. I was going to do something with the kids this weekend, but it was rather full, so last night we got crafty and made bead bowls as inspired by this pin.

Here’s what you need:

Ben’s Treehouse Bed

We seriously LOVE having our friends’ kids over. They’ve grown up with our kids and so when they’re together, they just pick up from where they left off last time and play together so well. They know our house rules and follow them (at least as well as our own kids d0) and best of all, they are a great distraction for our kids.

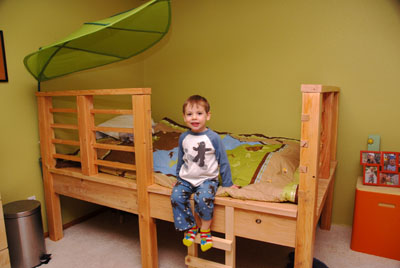
So with the kids good and distracted, we leapt into the final stages of Ben’s treehouse bed. We just had a bit of sanding and polying to do and then we took all the pieces of wood up to his room for assembly. They started out looking like this:  Continue reading “Ben’s Treehouse Bed”

Christmas PJs

I’ve been having too much fun to post very much! It’s been a whirlwind past few days but so nice. I’m pretty much resigned myself to the fact that I won’t be getting more than 6 hours of sleep until Christmas is over and I think I’m OK with that. Santa is almost done with his projects and mommy finished up a big one this weekend. I made my kiddos Christmas jim-jams!!

I found a great tutorial via Pinterest and used it to create some cute PJ bottoms out of fabric we selected at Joann’s. The process is pretty simple and the original author explains it way better than I could. But basically, you use a pair of pants your kid already has as a template for the new ones. You cut out the fabric in two pieces, one for each leg, folded, so the cutting is really easy. The pants are cuffed at the bottom, though she shows an option for making a ruffle too. I wish I’d done Tabby’s with the ruffle, but they were the first pair I did and I was a bit unsure of myself at that point. I also have some fabric for myself and I think there will be plenty leftover to make Tabby a pair from the same so maybe we can both have ruffles on those. Anyhow, they were super easy to make – maybe an hour? Even the first pair which I know I was slower at was pretty quick.

The coordinating tshirts are very similar to the applique tshirts I made them last year at Christmas time. To recap: purchase tshirt, use fusible interfacing to attach design to shirt, sew around edge of design. I had the kids pick what they wanted on their shirts (a shape, their initial, etc.) and then used the remaining PJ fabric to make the appliques. Super super simple and the kids are thrilled with them!

Salt Dough Ornaments

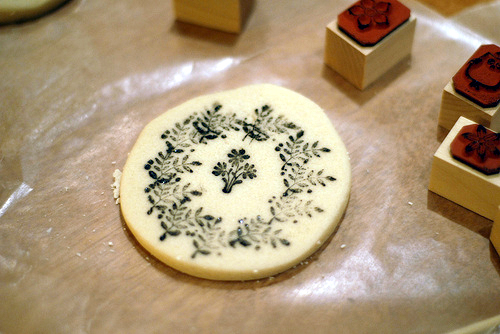
Last weekend, as part of our weekend festivities, we made salt dough ornaments with the kids. I’m sure I made them a few times as a kid, but I saw this pin on Pinterest and of course grabbed it for future reference. The pin image looked so much better than the painted messes of youth and it seemed so simple: make dough, stamp, bake. But when I delved further and actually looked at the pin link, it turns out it wasn’t salt dough at all but some sort of ceramic material. That is one of the bad things about Pinterest … you only have the word of the original pinner on what it is until you follow the link and read. But that’s one thing that’s great about Pinterest too, ideas build off one another. And so I decided to try it anyway with the salt dough.

Salt dough is super simple to make: 1 part salt, 2 parts flour, 1 part luke warm water (our parts were cups and that yielded dough for plenty of ornaments). Mix it up, knead it into dough. Ours seemed a bit sticky, so we added a bit more flour and got it to be the right consistency. This is much like bread dough … should stick a little, but not too much.

We rolled it, cut it and used stamps to decorate. The key with the stamps is to not press too hard because of course if you do you end up with a black square instead of a pretty stamp. A nice benefit of this is that you get a shallow indentation as well as ink mark. The effect is very nice. Then we used a skewer to make holes (Tabby also used the skewer to make little dots in hers) and baked at 200 FOREVER. Seriously, they’re still in my oven.

They turned out really cute and pretty similar to the original Pinterest photo. I’d love to experiment with some textures and I’d also like to have parchment on hand next time … the wax paper was eaten up by the salt in the dough and we couldn’t bake on it, so getting them off the cookie sheet was a might tricky, although they’re pretty strong.

Last word of advice … keep them away from your dog. Tabby found out the hard way that Loki likes the taste of salt ornaments, followed by a long visit to the toilet for some water.

Countdown to Christmas

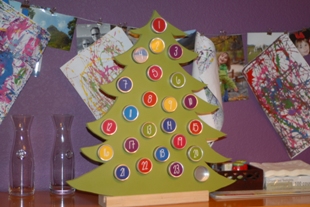
We have had a couple of advent calendars … a string of mittens and stockings that you can fill with things and an angel one with pockets from my childhood. But neither was utilized very well and neither really fits the aesthetic of our house. So this year, inspired by (as usual) Pinterest, I conned Matt into helping me make an advent calendar. My  first idea was to use a piece of metal and get a few of those nifty magnetic tins and stick ’em to it. I’m sure it would have been easier, but those dang tins are EXPENSIVE (at least any I could find). But 24 of these from Hobby Lobby were ~$20. The board and spray paint another $20. For $40 it isn’t the cheapest, but I do hope to use it for years to come. Here’s how we did it.

Continue reading “Countdown to Christmas”