Grilled Chicken Parm

Matt is a Chicken Parmesan connoisseur. It is his litmus test for any Italian restaurant. So I was a bit nervous to make this no-breading chicken parmesan from Biggest Loser. Though we all agreed there is a special place in our hearts for the yummy breaded variety of chicken parm, this was an excellent option and certainly one we can have a bit more frequently since it is easy and healthy!

I opted to serve mine over a bed of roasted spaghetti squash, the kids had the usual spaghetti, and Matt did a mixture of the two. On the side, we served steamed green beans topped with marinara – it’s a combo I hadn’t had before, but it was very tasty and of course easy. One of these days, I would like to work on perfecting a marinara sauce recipe, possibly to can in the summer when tomatoes are in season. But not today – today it was Classico bought in bulk from Costco. At least I don’t have any Italian ancestors rolling over in their graves. Just the German ones who can’t believe I hate sauerkraut and don’t drink beer. Continue reading “Grilled Chicken Parm”

Chicken Minestrone

Well the month and our experiment with The Zone is almost up as is my whirlwind tour of Zone Meals in Seconds cookbook. It’s been … interesting. I’ve done well on The Zone, losing about 9 lbs, which for a month is pretty good (and technically, I still have ’til Friday for my four weeks to be up, and I’ll be Zoned until then). I can’t say it’s something I feel like I could live with permanently. I like a bit more wiggle room in my life … I like food, good food, way too much to be this restricted, but I think it put me back on track with what I know to be healthy and reinforced some good lessons. Lean meat, healthy vegetables, less starches, little sugar, good fats.

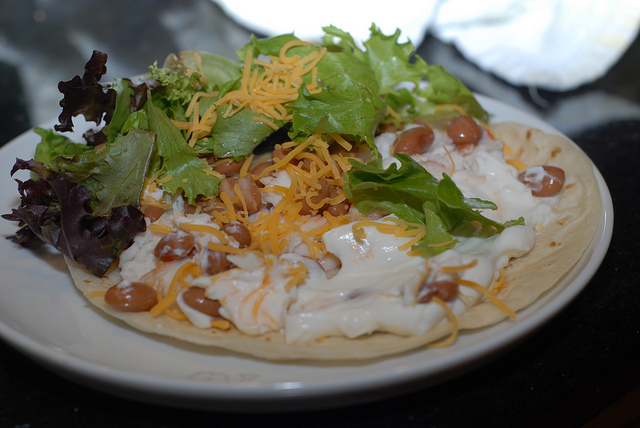
The cookbook itself was a meh. Let’s say a 4 out of 10. This book had two kinds of recipes … one was real recipes as we think of them, the other, just thrown together ingredients. They were both a mix of awesome and blech! with a few meh … thrown in there. My samplings:

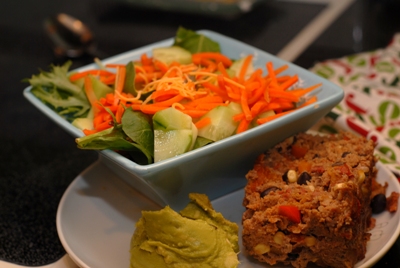
  1. Tex Mex meatloaf – seriously tasty; I’ve recommended this to a few people and it was very well received
  2. Salmon Tagine – loved the spinach, but the Salmon was just so-so
  3. Apple Spice Oatmeal – protein powder completely screwed up the texture; edible, but not yummy
  4. Moroccan chicken stew – ICK. Way too much of the cream of soup.
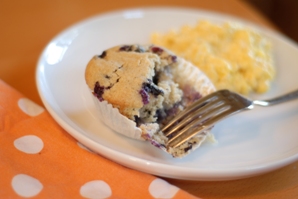
  5. Zoned Apple Muffins – These were good, but not great. Not a ton of flavor/taste.
  6. Mexican chicken chili – not so much a recipe, just a list of things to throw together in a bowl; pretty tasty though
  7. Blueberry and banana creme freeze – pretty tasty, even liked the sour cream in here – may post this one later.
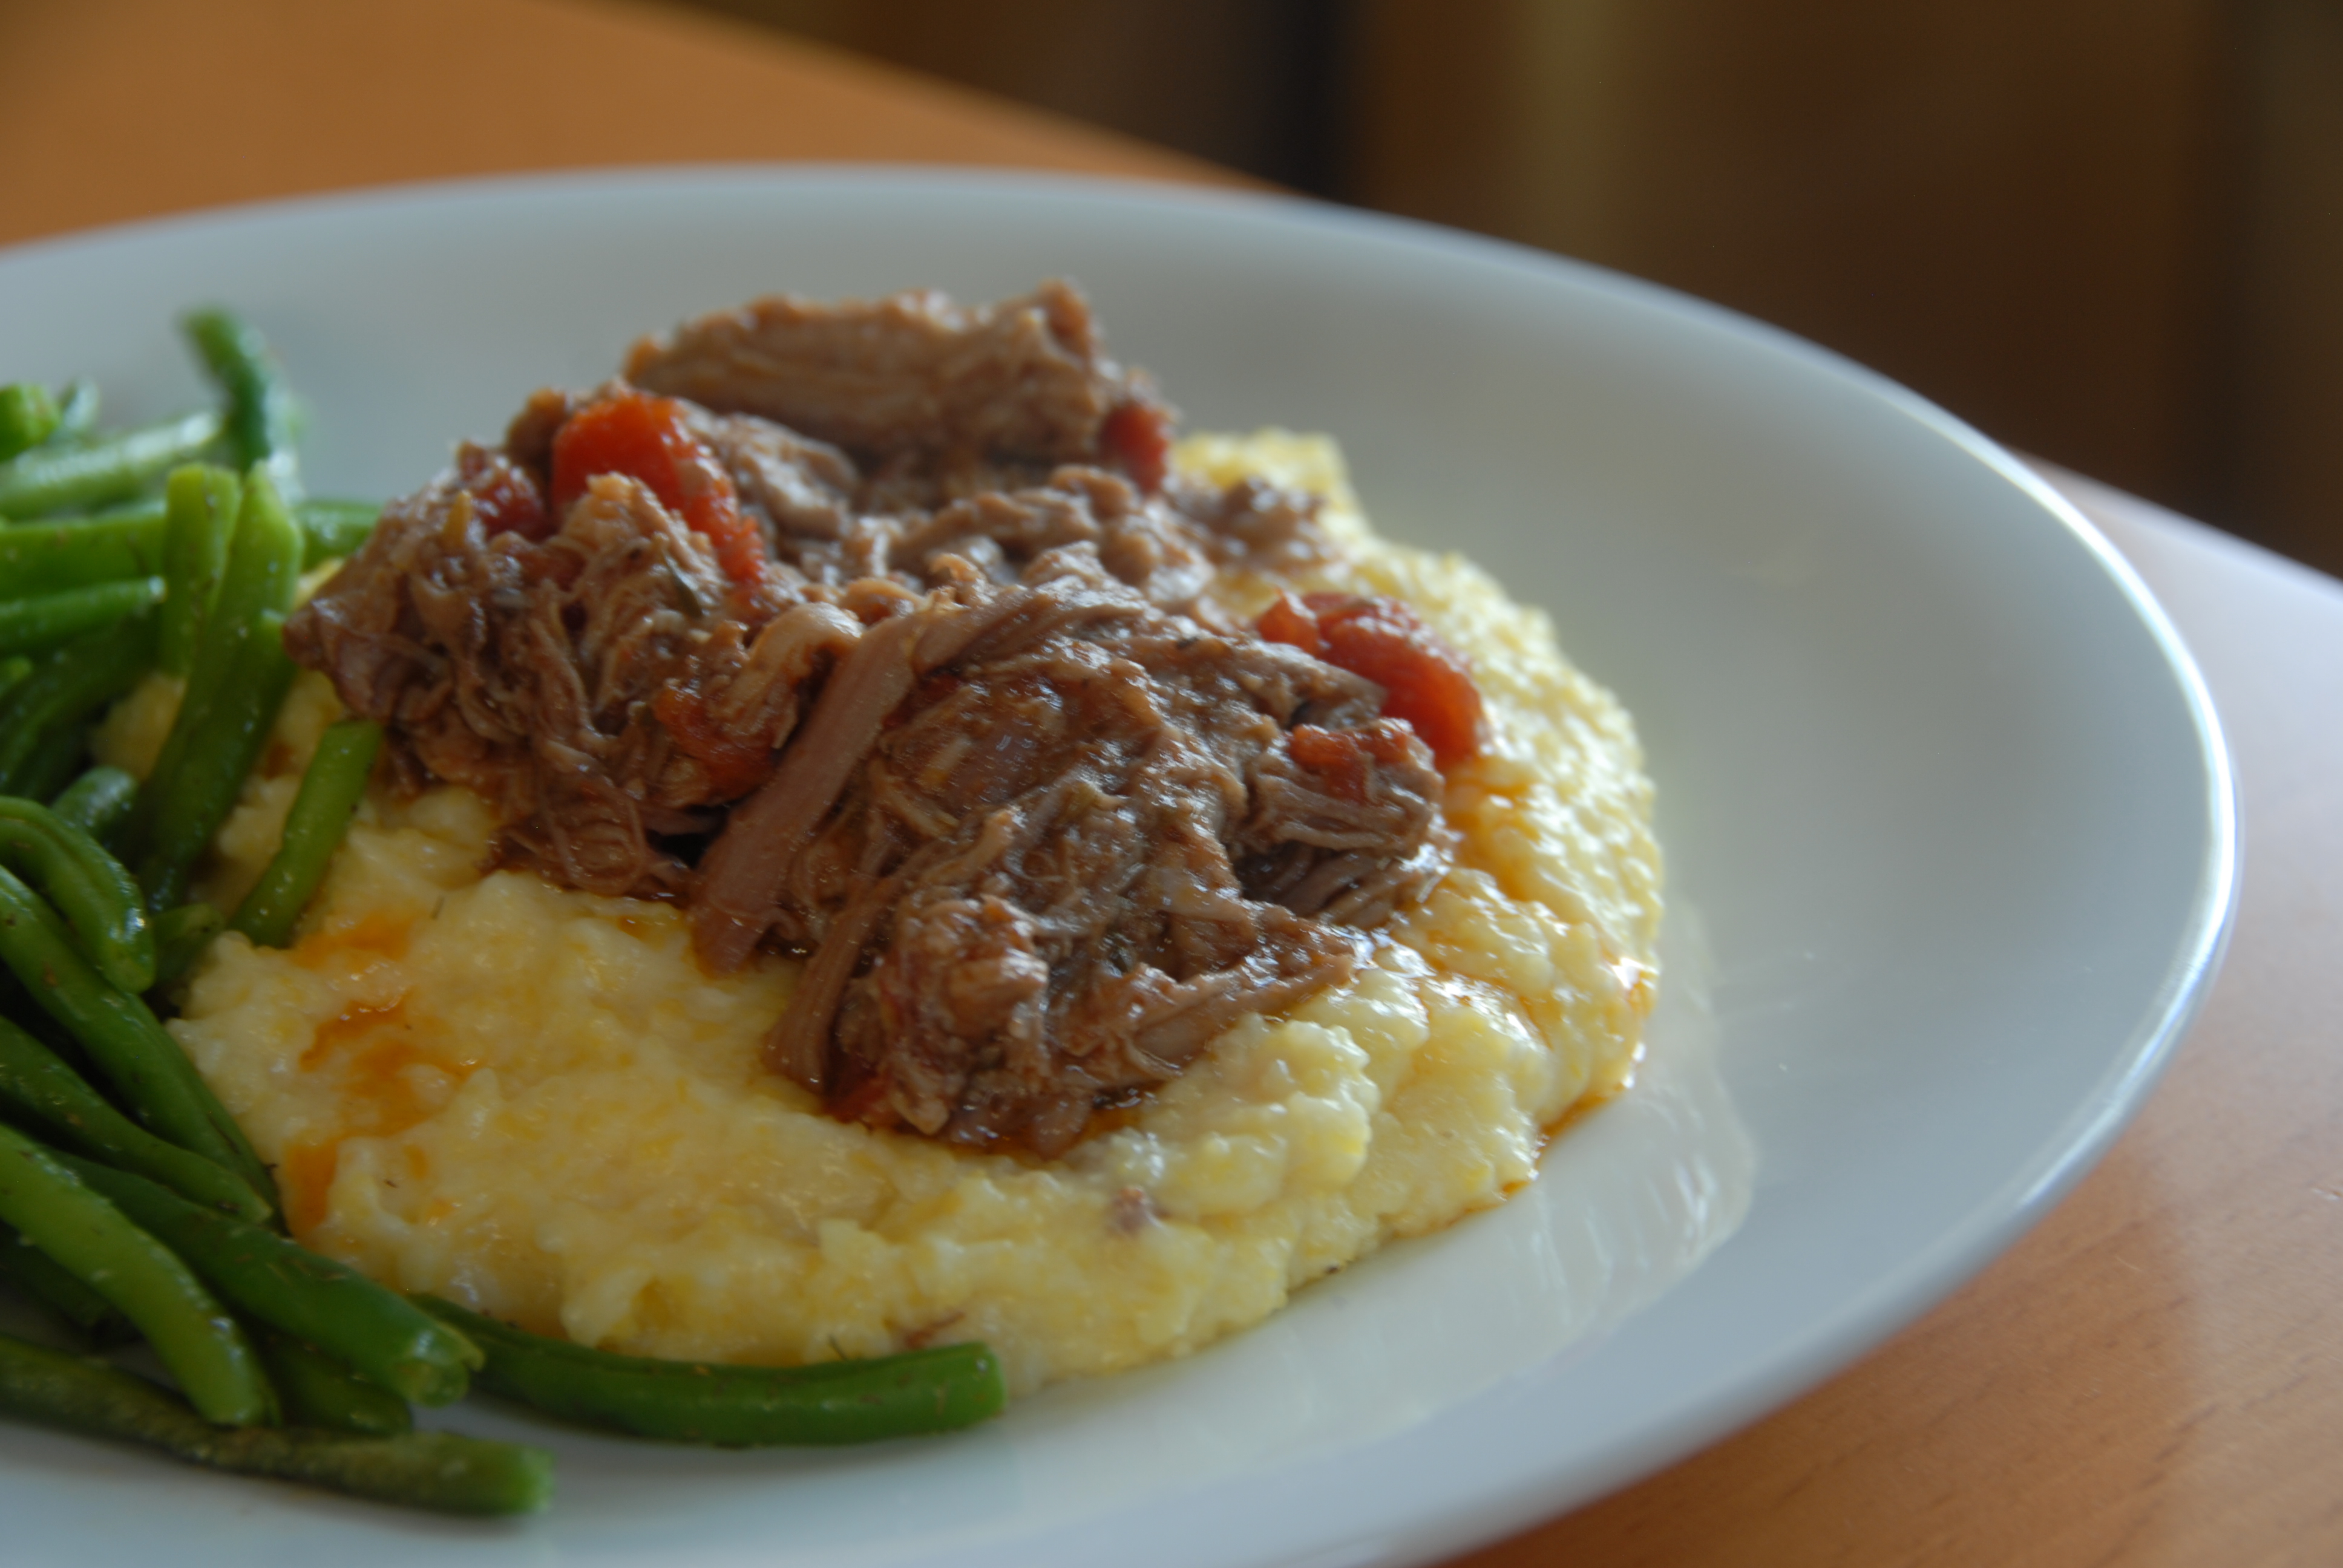
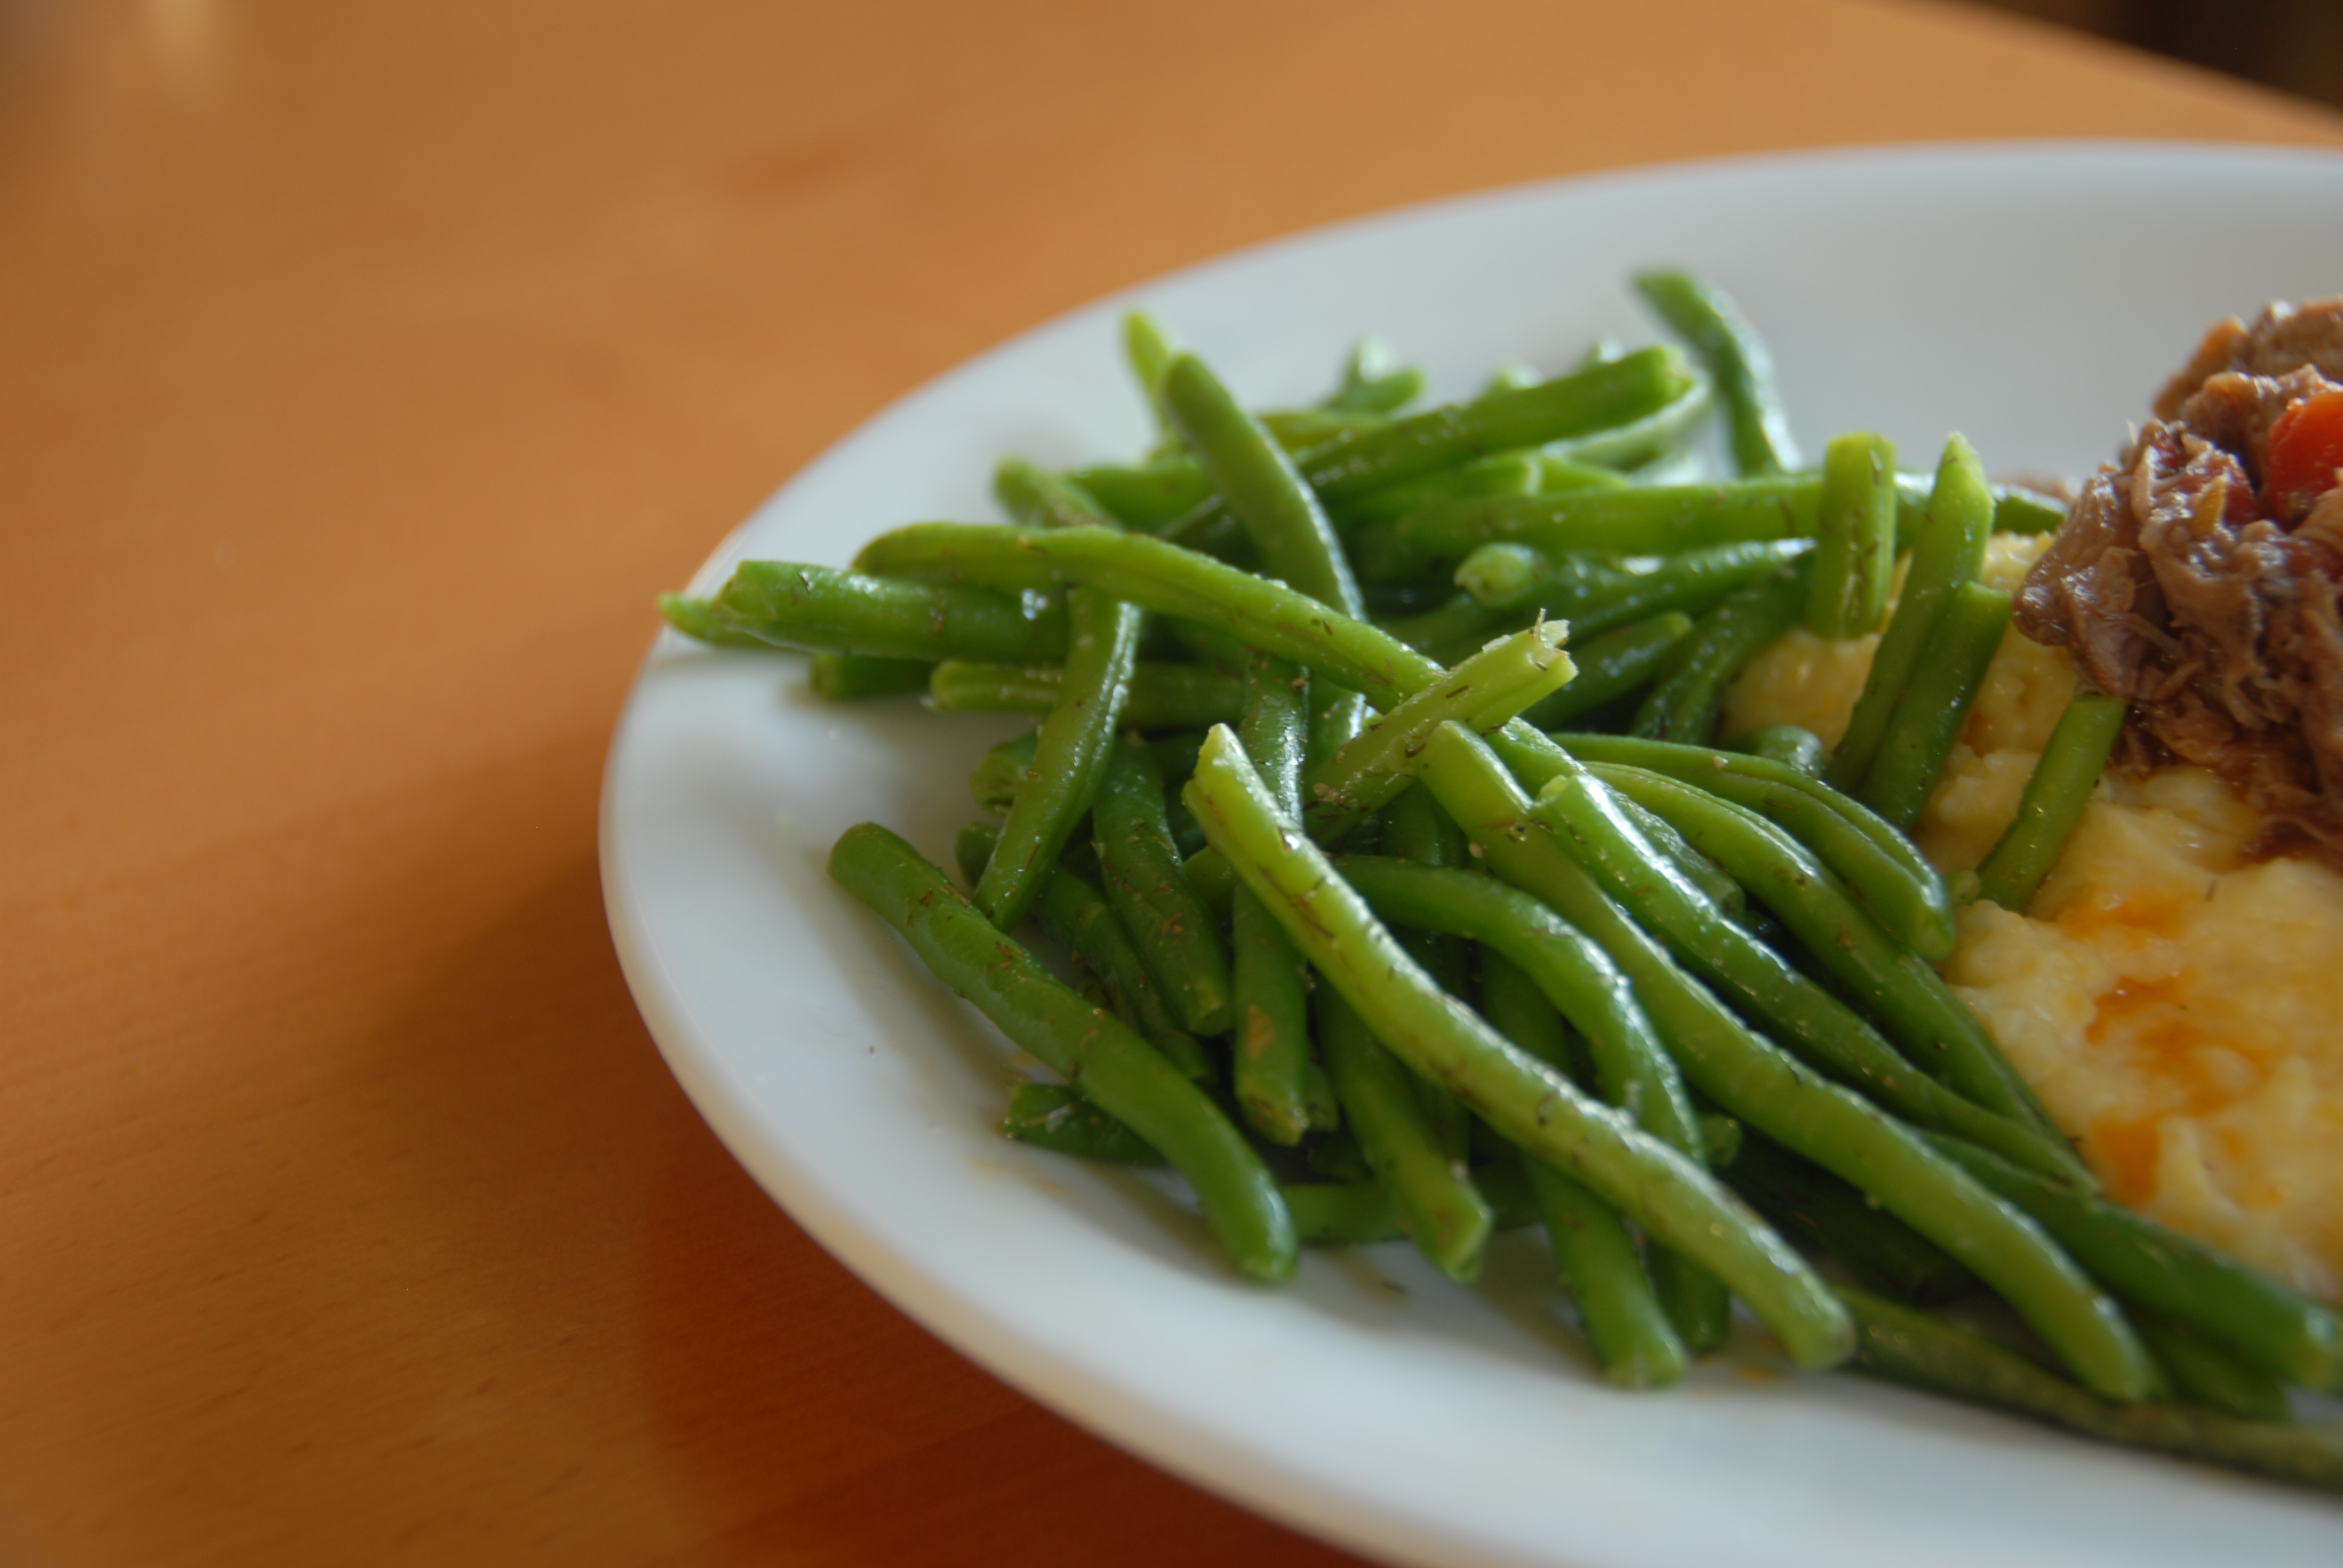
  8. Chicken Minestrone – quite good!

Anyhow, more about Chicken Minestrone. This is one of those recipe that I don’t even really consider to be a recipe because there’s just not much to it. Just a couple of raw ingredients, the rest from cans or the freezer section, but I know a lot of people struggle with even this and it could be a gateway recipe, so I will post it. It really is tasty and super healthy. This makes 4 4-block meals (a TON of soup)

Ingredients

  • 3 cups of cubed frozen chicken
  • 1 10 oz package cut green beans
  • 1 can of kidney beans, drained and rinsed
  • 1 qt low sodium chicken broth/stock
  • 1 jar marinara sauce
  • 2 cloves garlic, minced
  • 2-3 zucchini quartered and sliced
  • 3 T EVOO
  • dried oregano and basil

Directions

Heat the EVOO in a dutch oven. While the oil is heating, cook the green beans to about 75% done in the microwave. Add the chicken, garlic, zucchini, green beans and herbs to the dutch oven and cook until all are warmed through and fragrant. Add the kidney beans, broth and marinara. Stir to combine and bring to a boil and simmer for a few minutes. Season with salt and pepper to taste.


I really enjoyed experimenting with this cookbook this month. It’s not one that I expect to turn to often but it gave me a couple good new recipes. Next month will be The Biggest Loser Family Cookbook.

Tex Mex Meatloaf

Last night we tried the first recipe from Zone Meals in Seconds. I always love it when the first recipe I try from a new cookbook is a winner and this one was a MAJOR winner. Though this is Zone specific, Matt and I both agreed that we would eat it anytime. It’s your basic meatloaf, with a few interesting additions and served with a side of guacamole. Best of all, both kids loved it! Really, what’s not to like?

The full zone recipe has a side salad with romaine (we used baby greens), 1/4 C low fat cheddar per person, thinly sliced celery, shredded carrots and a 1/4 cucumber. Adding the salad makes it a full 4-block Zone meal if you’re interested. I added just a little salsa for dressing. I love me some salsa.

Ingredients

  • 2 eggs
  • ¾ cup  black beans
  • 1 tablespoon chili powder blend
  • 1 teaspoon ground cumin
  • ¼ teaspoon ground red pepper (optional)
  • 1 tablespoon tamari soy sauce (optional)
  • 1/3 cup non-instant rolled oats, uncooked
  • 15 ounces lean ground beef  (ground turkey works too)
  • 2 tablespoons dried onion flakes
  • ½ cup fresh or frozen corn
  • 1 cup minced yellow or red bell pepper
  • 1 cup no-salt diced tomato with jalapeño
  • avocado

Directions

Mix and mash as you would any meatloaf. Place yummy mash in a 9×5 loaf pan. Bake at 350 for 60 to 75 minutes or until thermometer regisiters 160 for beef or 180 for poultry. Mash/chop avocado and season as desired for guacamole (we use chili powder and garlic salt). Serve slices of meatloaf with guacamole. Groan and say “oooh” a lot while eating.

We actually made this the night before and baked it about 15 minutes extra to compensate for the chillier meat temps.


Apple Chips

This “recipe” is so simple I hesitate to even post it, but these are my kids new favorite snack and they are healthy, cheap and contain only one ingredient, so I thought I should share.

Ingredients

  • 4-5 medium apples apples, thinly sliced

Directions

I will give two methods for doing this. We have a dehydrator so we used that, but you can also use your oven. The prep, however, is the same. You’ll need to slice your apples very thinly … 1/8 inch or less, I’d guess. I’m sure someone can do this by hand, but I’m not that person, so I use a mandolin. They’re not too expensive and they’re super useful for many things as they slice in many thickness and grate as well. I do not bother to core them since the seeds come out as you slice thinly.

Oven: Heat oven to 225 degrees. Line two cookie sheets with silpats or parchment paper. You can also use cooling racks if you have some that are big enough to span cookie sheets. Place the apples on the cookie sheets. You can put them right next to each other, but don’t overlap. They will shrink some as they dry. Bake for an hour and flip if you aren’t using the cooling racks. Then bake another hour.

Dehydrator: Line all dehydrator racks with apples. You can really get them close together since they shrink as they dry. Turn dryer on. They will be pretty darn good after 2 hours, but we like to go closer to 4 to get them real crispy and since you’re not monopolizing the oven forever, you can.

There are all kinds of recipes on the net for these that add sugar (or splenda or maple syrup or honey), but I personally think the apples have all the sugar you need, especially after it’s concentrated when they dry and shrink a bit. I would like to try sprinkling a little nutmeg or cinnamon on these, but really, they are incredibly good as-is. We have been going through a batch a day easily. Luckily apples are 77c/lb right now!

Make-Them-Your-Own Muffins

One of the simplest weeknight dinners I make is a pan of scrambled eggs. I season/flavor them with whatever’s on hand: cream cheese and some dill, smoked salmon, leftover bacon, salsa, spinach and feta, ham and swiss and mushrooms. They are always a hit with the kids.

And whenever I do that I like to have some sort of lightly sweet baked good to go along with the meal. Sometimes it’s two-bite cinnamon rolls from Costco or just toast with jam, but likely as not, I make homemade muffins. I have used tons of recipes, but these are my go-to muffins that are perfect for using up any fresh fruit that’s getting past its prime or the tail-end of a frozen bag of fruit.

Ingredients

  • 3/4 cup all purpose flour
  • 3/4 cup whole wheat flour (you can do all one type if you like)
  • 2 t baking powder
  • 1/2 t salt
  • 1/2 C sugar
  • 1/3 C natural applesauce
  • 1 egg
  • ~ 1/3 C milk
  • 1 T oil
  • 1 cup chopped fruit or a bit more if you’ve got it
  • spices to compliment your fruit

Note about fruit/spices: this is a great recipe for doing your favorite or using what you have. I’ve done blueberries with just a little vanilla extract, blueberries with some lemon zest and peaches with cinnamon, allspice and cloves. I think these would be wonderful with apples and/or raisins and cinnamon or anything else you fancy.

Directions

Heat your oven to 400. Place liners in a muffin pan – this recipe seems to make between 10 and 15 muffins depending on how much fruit you use and how generous you are when putting batter in the muffin tins.

In a bowl, combine flour, salt, baking powder and sugar. In a 1 cup measuring cup, add the applesauce, oil and egg. Add enough milk to go to the 1 cup line and stir. Pour this into your dry ingredients along with any spices you’re using and stir until combined, but do not over-mix. Carefully fold in your chopped fruit.

Pour batter into prepared muffin cups. I like to do 2/3 to 3/4 full though the original recipe calls for filling them to the top! Bake for 18-25 minutes or until just browning on top.

Pork Ragu with Creamy Polenta (GRITS!)

So one of my favorite food blogs, Dinner a Love Story posted a recipe for Pork Ragu sometime back late this winter. The minute I saw it I marked it in Google Reader and vowed to make it as soon as possible. The recipe is ridiculously simple as far as prep goes and the only time consuming thing about it is that it cooks for 4-5 hours … but all you have to do is turn it once in a while. It’s the perfect thing to make on a Sunday afternoon while the kids are napping and you’re doing laundry and getting read for the week and darn if it isn’t super tasty. I will say that I have rarely if ever cooked pork before this (except bacon) because I don’t like it much, but this blew me away.

We have always served it with noodles (no yolk – healthier and just as tasty!) and everyone loves it that way. But after a meal I had a couple of weeks ago at Black Cat in Boulder (oh what a meal!) where I was served some tasty tasty pork on top of polenta/grits, I knew that this pork ragu would go AWESOME on some creamy polenta (GRITS) …. and it does. They are just the right offset to the richness of the pork and so so tasty together.

Ingredients

for the pork ragu

  • 3.5-4.5 lb lean boneless pork shoulder
  • salt and pepper
  • pat of butter
  • olive oil (2 T or so)
  • 1 large can diced tomatoes
  • 1 cup wine
  • 1 tsp hot sauce for smokiness
  • handful of fennel seeds
  • a few sprigs each fresh thyme and oregano (or a tsp or 2 each dried)
  • parmesan for serving

for the grits/polenta

  • 1 C stone ground grits/polenta
  • 4 C milk
  • 1 T butter
  • salt and pepper

Directions

Heat your oven to 325. Salt and pepper the heck out of the pork. Heat your olive oil and butter in a dutch oven and brown the pork on all sides … about 2 minutes per side. Add the tomatoes, wine, herbs, spices and hot sauce and bring to a boil. Then transfer to the oven and braise for 3-4 hours. If the liquid does not come 1/3 of the way up the roast, add a bit more (water or wine) to the mix to keep it going. The meat is done when it’s falling apart. Remove from the oven and shred with a couple of forks.

When the roast is almost done, make the polenta. Heat the milk to a low boil and whisk in the grits/polenta. Lower the heat slightly and stir frequently to make sure it doesn’t burn. Continue cooking until desired consistency, about 10 minutes. Season with salt and butter. Serve pork over top of a bed of polenta and top with parmesan if desired.  Dilly green beans were excellent with this! Make it soon before it gets too darn hot to turn the oven on.

Dilly Green Beans

I think of my paternal grandparents when I make this. Even though it’s not something they actually served, the combination of dill and green beans is very much THEM. My dad’s parents had a huge garden with loads of vegetables and my grandma was an amazing cook in the southern tradition. My grandpa proudly tended his garden and loved the smell of dill. My maternal grandma still loves to talk about him bringing her a bouquet of dill. A truly lovely thought.

The kids … mine and our good friends’ are crazy about this recipe. They scarf down the dilly green beans right along side mac ‘n’ cheese and hot dogs and that’s pretty high praise. Fresh dill is lovely, but dried works well too.

Ingredients
green beans
butter
dill (fresh or dried)
salt & pepper

Directions
Cook your green beans until done. I like to steam them in skillet with just a little water if fresh, or nuke them if they’re frozen, of course. While still hot, add the butter and mix it in so it melts. You do not need much butter. A tablespoon gives an entire pound of green beans a very nice flavor. Then season with dill and salt and pepper.

Fish Tacos


A looooong time ago, bloggy buddy Kjersten, who I got to MEET just a couple of weeks ago, wanted to know more about my fish tacos. I am happy to spill!


The fish I use in fish tacos is one of two things: either white fish from the freezer section at Target. Yes, that sounds sketchy, but it’s great fish and it comes in individual fillet portions, ready to cook up as desired (I get their salmon too). The other source I use is (don’t laugh) fish sticks. Fish sticks require just slightly less prep/thought and I keep a bag of them in the freezer (Target again) to have on hand. I honestly cannot say I like one more than the other … both good, just depends what you’re in the mood for. The fish sticks somehow seem more like comfort food. My kids eat both and don’t whine about either.

DSC_0002
To make the white fish, I heat the oven to about 400, put the fillets on a baking tray and cook them for a couple of minutes to start the de-frosting. Spices stick better when they’re not bricks.

DSC_0008
Then we sprinkle on garlic salt and chili-lime seasoning (my mom brought that back from Mexico, but I’m told you can get it in the grocery store too, spice or Hispanic foods aisle). This is what we use, but others simply opt for salt and pepper sometimes with olive oil, which is very tasty as well.

DSC_0014
Then I continue to broil them until they’re flaky as fish should be. To assemble, we use small flour tortillas, beans, cheese, lettuce, tomatoes, avocado, sour cream, etc. etc. and a squeeze of lime. The lime is particularly important to me and to Tabby as well (go figure). … we serve Ben’s in the same manner, just deconstructed a bit.


Sloppy Joes

from: Ellie Krieger

Ingredients
1 pound extra-lean ground beef
1 onion, diced
4 cloves garlic, minced
1 jalapeno, minced
1 red pepper, diced
1 can small red beans or pinto beans, preferably low sodium drained and rinsed
1 1/2 cups no-salt-added tomato sauce
2 tablespoons tomato paste
1 tablespoon red wine vinegar
1 tablespoon molasses
1 tablespoon Worcestershire sauce
1 teaspoon mustard powder
3/4 teaspoon salt
Freshly ground black pepper
8 whole-wheat burger buns

Directions
Brown the meat and the onion in a large nonstick skillet over medium-high heat for 5 minutes, breaking up the meat into crumbles as it cooks. Pour the drippings out of the pan and discard. Add the garlic, jalapeno, and red pepper and cook 5 minutes more, stirring occasionally. Stir in the rest of the ingredients, reduce heat to low, and simmer for 5 minutes more. Place a half-cup scoop of the mixture onto each bun and serve.

Nutritional Info (1 sloppy joe (makes 8)(
Calories: 248; Carbohydrates: 37 grams; Total Fat: 4 grams; Saturated Fat: 1.1 gram; Protein: 18 grams; Fiber: 7 grams; Sodium: 535 milligrams

Creamy Pumpkin Pasta

from: http://www.momadvice.com

Ingredients
2 garlic cloves
2 tbsp olive oil
1 pound package of Sweet Italian Turkey Sausage (removed from its casing)
2/3 cup to 2 cups pumpkin puree (depending on your personal taste)
1 can chicken broth
¼ cup half & half
½ cup sour cream (low-fat or fat free)
¼ tsp nutmeg
1 tsp salt
¼ tsp white pepper
1 tsp sage
2 tbsp fresh parsley, minced
¼ cup Romano Cheese, shredded
1 pound penne or rotini pasta

Directions
In a large skillet sauté the garlic in the olive oil on medium heat. Add the turkey sausage and cook until no longer pink, breaking the meat up with your spoon as you cook it. Remove turkey sausage and garlic from the skillet. Pour the chicken broth into the skillet and deglaze the pan using a wire whisk, to bring up all of the flavors stuck to the pan. Whisk in the half and half, sour cream, pumpkin, and seasonings. Simmer for ten minutes. Meanwhile, boil the pasta in salted water until al dente. Drain pasta and stir into the pumpkin mixture along with the turkey sausage, simmering for another three minutes or until the sauce thickens and hugs the pasta. Stir in parsley and garnish with Romano and more parsley.