
I know I’ve been a bad blogger. Like terrible. But man, it’s been NUTS. Work got nuts. Then I got sick (strep-AGAIN) making work even more nuts. And of course it’s not like all the regular stuff stops when I’m sick or busy at work, so on and on it goes.
We’ve been kicking butt around the house. You should see the cool stuff we did last weekend. It’s not super photogenic (like this project), but we started the weekend with one vehicle (our pop-up) in the garage and ended the weekend with all three in there. We are ready (though not anxious for!) snow. We got tons of cardboard and boxes and random stuff gone and hung everything up. Then to top it all off, we installed landscaping lighting in the yard because the landscaping is going in SOON.
Anyhoo, the project.
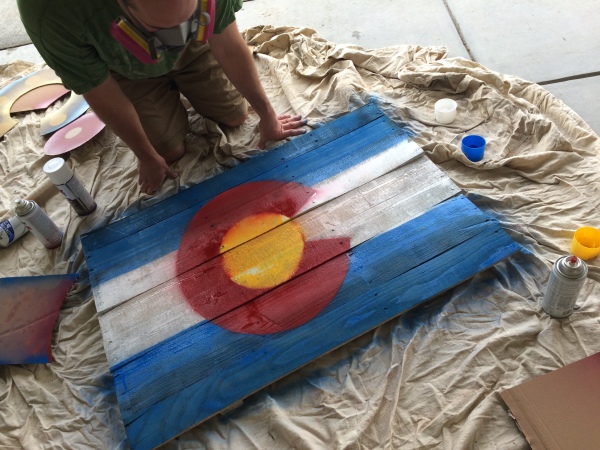
Labor Day weekend when we were in Vail, we had the pleasure of dining at Mountain Standard, the sister restaurant to one of our perennial faves there, Sweet Basil. It is the same awesome food, but more of a low-key casual atmosphere. And directly above our table was a very cool industrial-chic version of the CO flag made from reclaimed wood. I loved it immediately and knew we had to DIY one for our house. We started asking around about pallets and in a ‘hood still well under construction they’re pretty plentiful. So last week in the middle of crazy, Matt suddenly jumps up and goes “roofers!” and runs out of the house. Apparently that was code for the fact that our super had told him that roofers always had pallets and he was tracking them down. Just an hour or two later, we had 6 pallets all to ourselves! For free! Score!
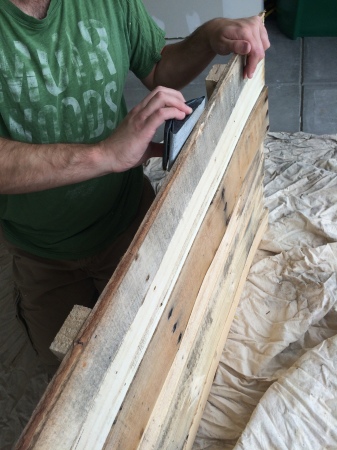
The first thing we had to do was disassemble them. Pallets are a hot mess of semi-crappy wood and nails, so we went to the interwebs to figure out the best way to do it. We read all up on pallets as well and ascertained that ours were in fact free from dangerous chemicals (these were actually phased out around 2007 so if the ones you get are new, you’re probably safe). So after reading up, we decided the best option for us was the sawsall! Matt of course owns one and he and his handy demolition blade made relatively quick work of two of them so we’d have our pick of wood.
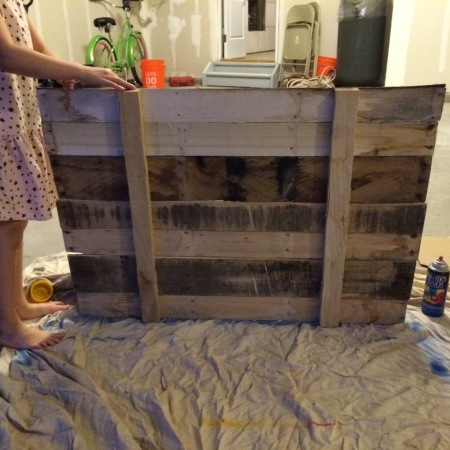
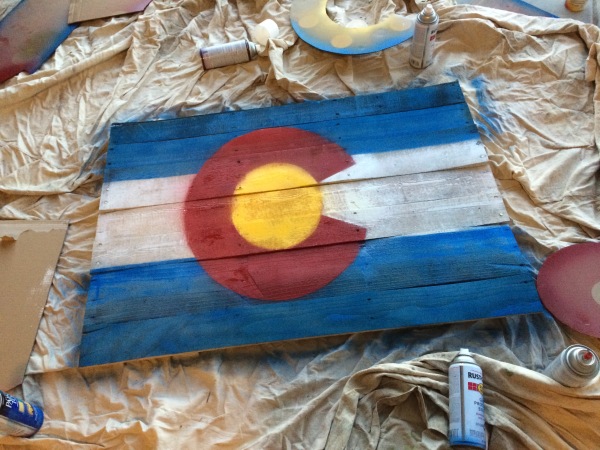
Then we laid it out. The wood was 40″ wide and in a wide variety of condition. Some had gotten wet, making it wavy, some had gotten knicked by the sawsall, some had mold (ick). And it was different widths. Looking at flags on the ‘net to determine ratio, we decided between 25 and 27″ tall was best for us, and we ended up with a couple of wider pieces and 4 narrow ones. We then used some of the other bits of reclaimed wood to nail them together along the back (two pieces total).
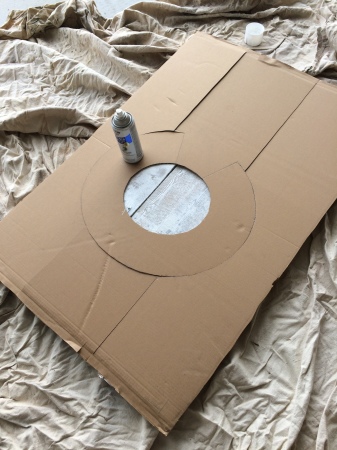
Next I had to make a stencil for it. Using my mad chops from the days of art class, I used the little projector we have to project an image of the correct size on the wall and then taped a piece of cardboard (we have TONS) that I tacked to the wall. Then I traced the outline of the flag with a pencil and then cut it out with an exacto knife, maintaining the pieces to use as mask as we worked.
 Then came the fun part – painting. Well almost, Matt insisted on running over it with some coarse grit sand paper first. He’s exacting like that.
So finally painting!!! As with all painting, you work from light to dark, so I did the white stripe first. I actually only eye-balled this, knowing I could easily paint over the overspray.
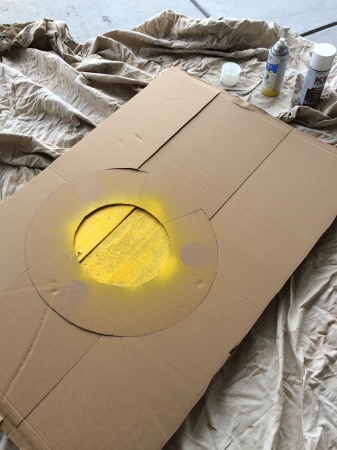 Next the yellow.
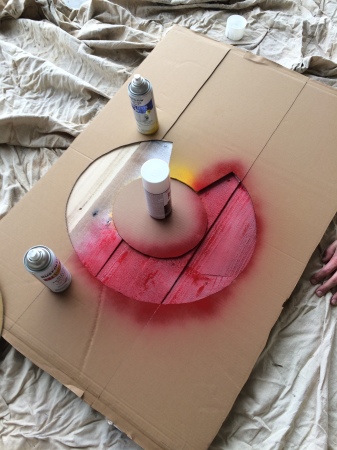 Then the red.
And finally the blue! We were a little over excited so we didn’t take as much time as we should’ve between colors, but fortunately that only meant a leeetle bit of touch up.
And just for funsies, we figured out what it would cost us to buy one of these on the interwebs. Bargain price as $100 and we saw them for as much as $200. I am also very grateful to my state for having a pretty simple flag design. NY or CA’s flags are simply out of my artistic skillz.