 For the past few years, we’ve done our garden from seedlings purchased at the nursery. There’s nothing really wrong with doing so – we get a reasonable variety of heirlooms from them – but we have always wanted to try growing our own. This year we finally made it happen. I ordered seeds from Seed Savers at the beginning of March. They came and at first I despaired because getting them started seemed like such an easy yet complicated task. There were so many rules and colors of light and recommendations. But I happened upon a great article that really broke it down for me and I made a trip to Lowes and (all by myself) got everything we needed to do the indoor starts. Matt helpfully followed up with another trip for shelving.
One day during nap time, Matt and I installed the shelves. We picked some modular ones that hang on our walls and adjust. The growing center is in the corner of his shop and we want to be able to store away the shelves when they’re not being used to grow things. They were super easy to install and we completed the job in no time flat. This year we just used two shelves, though we can add more later. The top shelf is just used to hang the fluorescent light fixture from and the bottom holds our starting trays. I purchased a couple of pre-wired fixtures (shop lights) that you just have plug in. You have to use two different kinds of bulbs to fully emulate sunlight, 6500 K temp and 5000 K temp – I found GE brand Daylight and Sunlight that were the right temps. Then you put them on a timer to be on for 14 hours/day and off the remaining 10. Since our power here is more expensive during the day, our little guys are nocturnal.
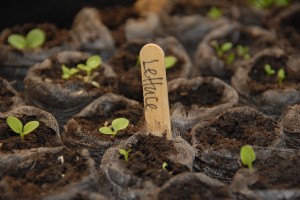
[flickr size=”small” float=”right”]5587727710[/flickr]Once the shelves and light were up, we got to do the fun business of planting. We used Jiffy starter trays: smaller ones for our strawflowers and lettuce and bigger ones for our two types of hardy tomatoes (Wisconsin 55 and Siberian – if they can grow there, CO will feel like Florida!). The trays are segmented with maze-like wells to direct water to all seedlings. Each compartment holds a dirt pellet contained in a fabric sort of mesh. You pour warm water on it and it puffs up like crazy (3-4 inches) and then you can plant your seeds. Once the seeds grow, you can drop the whole thing, puffy pellet and all in the ground. I hope to be able to replace the pellets and not waste the plastic trays but if not, they were pretty inexpensive.
[flickr size=”small” float=”left”]5613231356[/flickr]The kids absolutely delighted in making little holes and dropping seeds in. She was a bit disappointed to learn that, like her pottery project, there was a certain lag time between starting it and seeing the finished results. But lucky for her, our predicted germination time of 7-14 days turned out to be more like 3-4 days and she could quickly see the fruits of her labor. Each morning she’s been asking Matt to go see her plants and she is super super thrilled to have the responsibility of watering them with her very own watering can. It’s yet another thing that is absolutely magical through the eyes of a child.


I love that you got the kids involved! Thanks so much for linking to our article at CGG, too. Think you’re hooked?
They are having so much fun with it! I’m so glad we persevered. Thanks for simplifying the process for me. This is about my third year with the garden and I am loving the seed starting part. I definitely think I’ll do it again next year … but probably more!! 😉
AH! Good memories!!! I used to do this every single year until we moved to CA and don’t have any room to plant anything. Hm…. this just sparked an idea! I wonder if I could turn Jack’s balcony into a little garden??? Could be messy, but could be really cool! Thanks for getting the gears turning in my brain. I’ve been bummed about not having a garden for YEARS.
Totally! I just looked through some seed catalogs yesterday and there’s a few varieties of cucumbers that grow on a bush that they say is perfect for a patio! I personally favor basil and tomatoes. mmmmmmmm
That is s great the kids are involved.