Washer Necklaces

It was a pretty good weekend, overall, but there was some more mischief about in our ‘hood. More on that, tomorrow, probably. But for now, something fun. Washer necklaces!! I’d pinned this cute little craft for making necklaces out of washers … but it was a bum pin and ended up leading nowhere, so I googled washer necklaces and came to this site with a great tutorial. You don’t need much to do it (I actually had everything on hand after stealing a couple of things from Matt’s woodshop).

Here’s what it takes:

  • washers, whatever size you fancy
  • scrapbook paper … smaller print is better
  • adhesive to affix paper to metal (I ended up using some kind of fabric adhesive, but the site recommends E6000 which would be good too)
  • sandpaper
  • an exacto knife
  • dimensional medium
  • cord to string it on

Here’s how:

Continue reading “Washer Necklaces”

Mini Photo Book

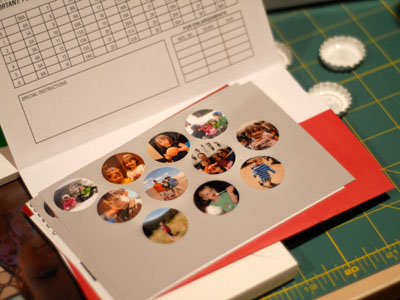
This little project was inspired by a few different pins, but particularly this one who links to this great site, Printstagram, where you can turn your Instagrams into cute little books! Well SOMEONE can, but not me because Instagram has not yet come to Android (though I hear it is imminent!). Anyhow, not enjoying being left out of the cute little book party, I decided to make my own.

I started out by making a templateĀ  in photoshop: 3 rows of 4 2-inch squares and 580×580 photos that fit handily into the squares with just a nice little white border. Print and cut out. [wpdm_file id=1] Continue reading “Mini Photo Book”

Chicken Caesar Chalupas

We had such a nice weekend. It is rare that our weekends aren’t jam-packed with crap we must get done, but this one just had a handful of little events planned with longer stretches of nothingness going on in between. Friday I took the kids to the Zoo with my mom. It was a beautiful day and we had a wonderful time. Afterward, we went downtown and had lunch at Euclid Hall with my sister.

Saturday morning I got up and went running with my pal J … we pounded out 9 miles on Clear Creek and got good and caught up – we hadn’t seen each other in a long while. Matt was supposed to have come along as well, but unfortunately Ben woke up in the wee smalls throwing up everywhere. I hate it for him – he just got over a cold only to have this icky tummy bug hit him. He seemed mostly recovered yesterday, but had it on the other end all day today and was generally a bit lethargic.

Today was even more low key. We went to a birthday party in the morning, hit the grocery store on the way home, had naps and worked around the house a bit. The start of Dayligh Savings is kind of messing with our heads and when we suddenly looked at the clock and it was almost 6:30 we knew why our stomachs were grumbling.

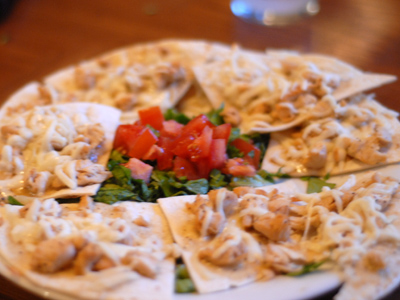
We whipped out the ingredients for Iowa Girl Eats’ Chicken Caesar Chalupas (found via Pinterest) and had them ready in a flash. We let the Sunday Dinner be a bit more low key and ate at the coffee table while we watched old episodes of Scooby Doo. Everyone enjoyed them, except Ben who is confined to BRAT until he recovers some more. They were very tasty and a good format for many meals, very similar to the tortilla pizzas we make routinely. We used ingredients on the healthier side of things (low carb tortillas, 2% cheese, lite salad dressing) to keep them on the lighter side.

Chicken Caesar Chalupas

  • tortillas
  • chicken breasts, chopped into bite-sized pieces
  • lemon pepper + salt
  • cooking spray
  • Caesar salad dressing
  • shredded mozzarella
  • romaine lettuce, chopped
  • tomatoes chopped

Directions

Heat oven to 400. Spray baking sheet with cooking spray. Spray skillet with cooking spray and heat on medium high. Season both sides of chicken with lemon pepper and salt. Brown chicken in skillet until done. Cut tortillas into wedges (scissors work great!) and place on cooking sheet. Spray tops with cooking spray and bake for a couple of minutes until toasty. Top tortillas with a bit of dressing, chopped chicken and mozzarella. Return to oven and bake a couple more minutes to melt cheese. Serve with romaine and tomatoes for scooping.

Nannersp
Check out all the other great Pinteractive Projects on Nannette’s site!

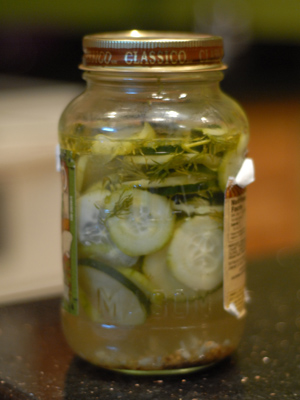
Refrigerator Pickles

Have I mentioned how big a deal dill pickles are at our house?? Everyone LOVES them. Except Matt because he’s weird. They are a favorite snack and we even have a specially made vintage Tupperware Pickle container for them that lives in the fridge, filled with mini gherkin goodness.

Since doing some canning last year, I’ve thought a couple of times about drying to make our own pickles. With the acidity level of pickles being pretty high (thanks to the vinegar) they would not require a pressure canner, but just a water-bath canning method. Anyhoo, as far as things to do, it’s pretty far down on the list, but then I saw a recipe on Pinterest for refrigerator pickles! They only last for a couple of weeks, but the way we go through pickles, that is NO problem. So we gave them a shot.

Super easy, super tasty, a TOTAL hit. Here’s how we dunit.

Refrigerator Dill Pickles

Ingredients

  • 2 lbs cucumbers (recipe called for “kirby” cucumbers – I used the grocery store standard, sliced 1/4 inch thick
  • 1.5 cups distilled white vinegar
  • 4t kosher salt
  • 1/3 C sugar
  • 1 t mustard seeds
  • 1 t coriander seeds (we could not find this and instead used ground coriander instead)
  • 3/4 t dill seeds
  • 3/4 C chopped fresh dill
  • 3 cloves garlic coarsely chopped

Directions

Combine vinegar, salt, sugar, mustard seeds, coriander seeds and dill seeds in a bowl and mix to combine. Cover with two cups hot water and stir until salt and sugar have dissolved and liquid is clear. Let cool to room temperature.

Toss together cucumbers, dill and garlic. A note on the cucumbers: the recipe did not say whether to peel or not, so we did two cucumbers peeled and one not peeled. They both seemed equally tasty and the peel provides a nice color and presumably some fiber, so I’d not bother with peeling next go-around. Pour the brine over the cucumber mixture and place a plate or similar on top to keep the cucumbers submerged in the brine.

Cover with plastic wrap and refrigerate overnight, stirring once or twice if you happen to think of it (we didn’t, they were delicious anyhow). Transfer to a jar the next day and enjoy for the next two weeks – if they last that long!


Nannersp
Check out the other great Pinteractive Projects on Nannette’s Site

Bottle Cap Photo Magnets

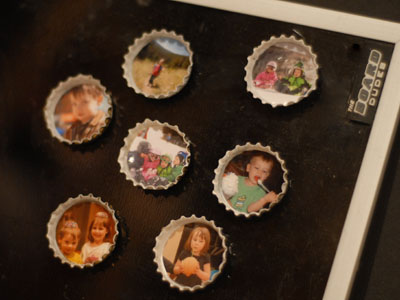
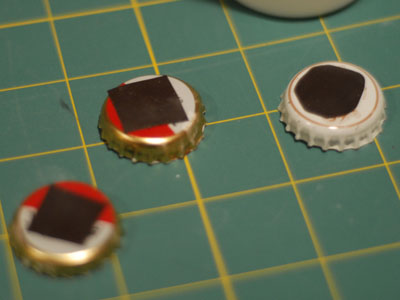
As a fun little project for this week (shoved into the later hours of Monday night!) I made some bottle cap magnets. They were super simple and had great results. Earlier in the day, I’d picked a few photos and cropped them into 1″ circles and put them all on a 4×6″ image and then had them printed at Target ($0.19/ea).

So with the photo settled, I prepped the caps. I tried to take out the liners, but they were difficult/impossible to take out entirely and I’m not absolutely sure this step was necessary. I ended up shredding my finger with the pointy tool I was using for this. Tons of fun.

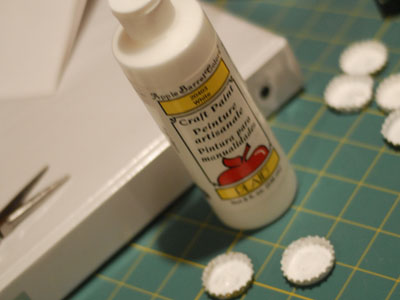
Then they got a quick coat of white craft paint.

While they were drying, I took the opportunity to put some sticky-backed magnets on the back of the caps. If I did this again it might be worth it to invest in a 1″ circle punch for neater results, but this works well enough.

And I cut out the little photo circles.

After that all there was left to do was glue them into the bottle caps. I used a bit of 3M Maximum Strength adhesive, but many things, like Gorilla Glue or E3000 would work just as well.

I am very happy with how they turned out! They will look very cute on the fridge or wherever they end up.

Nannersp
Make sure to check out the other Pinteractive Posts on Nannette’s website.

Fridge Pen Can

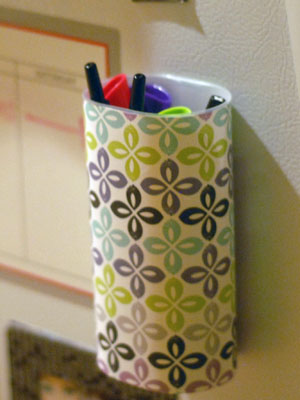
Since we got the new fridge, I’ve been trying to keep it nice and neat and use it for organizing our household. I got a slick Martha Stewart stick-on white-board style weekly calendar to put our schedule and menu on. Looks nice, but the dry-erase markers I’ve got were always going missing, along with my other kitchen pens. Inspired by this pin, I made a nice little decorative can that lives on the fridge and holds our pens.

Mine is made from an old Crystal-light container one from the sticks that you use to make a whole pitcher of the stuff (we make it when camping). Anyhow, it’s oval-shaped and has a couple inches of flat on the back, which I think would be important for getting as much magnetized surface area as possible. Here’s how I went about it: Continue reading “Fridge Pen Can”

Bead Bowls

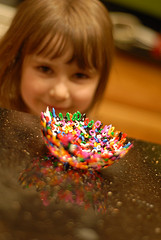
So bloggy bud Nannette challenged everyone to stop pinning and start making. OK, well not STOP pinning. That would be crazy, but to definitely start MAKING in her Pinteractive challenge. I was going to do something with the kids this weekend, but it was rather full, so last night we got crafty and made bead bowls as inspired by this pin.

Here’s what you need:

Blueberry Buttermilk Muffin Cake

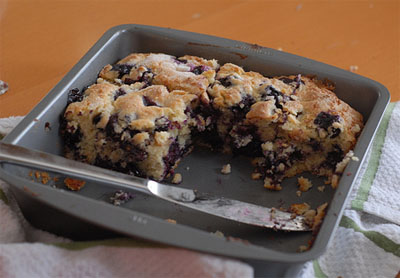
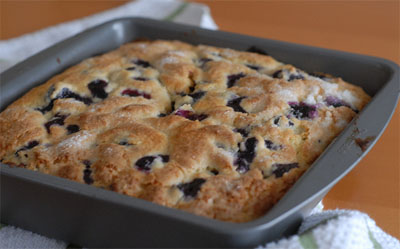
This weekend, post Zone, during the midst of our snowstorm, we had a very nice family breakfast. We don’t do leisurely breakfasts very often. Weekdays the kids are at their sitters, I’m at the office and Matt … I’m not sure Matt even eats breakfast most days. But on Saturday, we had no place to be at any certain time. So while Matt shoveled the walk and the kids played outside (again), I made Blueberry Buttermilk Muffin Cake (original recipe from Alexandra’s Kitchen). It came out super light and fluffy and browned on top and everyone absolutely loved it. We ate it with a side of bacon and some yogurt and of course, tea.

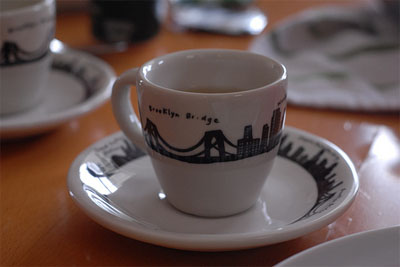
I picked up these darling little teacups for the kids at Fishs Eddy while we were in NYC. I think they’re technically espresso cups or something, but they make great little people teacups. I love the charming NYC skyline pattern and they’re a really fun souvenir. The size is great for the kiddos because even if they get spilled, the amount of liquid they hold is pretty small.

So we ate breakfast. We talked about our trip to NYC and Ben talked at length about what a funny movie Home Alone is and how Kevin smacks the burglars with paint cans, etc. Of course I only understood about half of what he said. That makes it all that much better.

Ingredients

  • Ā½ C butter, at room temperature
  • 2 t lemon zest or more
  • 3/4 C + 3 T sugar
  • 1 egg, room temperature
  • 1 t vanilla
  • 2 C flour
  • 2 t baking powder
  • 1 t coarse salt
  • 2 C fresh blueberries
  • 1/2 C buttermilk

Directions

Heat oven to 350. Cream together butter and all but one tablespoon sugar. Add egg, lemon zest and vanilla and mix thoroughly. Meanwhile, sift together 1 3/4 C flour, salt and baking powder together. Toss remaining 1/4 C flour with blueberries. In alternating batches, add buttermilk and flour to sugar/butter mixture. Gently fold in blueberries.

Lightly grease a 9×9 (or 8×8) square pan) and spread batter in. Sprinkle with remaining tablespoon of sugar and bake for 35 to 40 minutes.

This was wonderful warm from the oven and just as yummy cold the next day.

Christmas PJs

I’ve been having too much fun to post very much! It’s been a whirlwind past few days but so nice. I’m pretty much resigned myself to the fact that I won’t be getting more than 6 hours of sleep until Christmas is over and I think I’m OK with that. Santa is almost done with his projects and mommy finished up a big one this weekend. I made my kiddos Christmas jim-jams!!

I found a great tutorial via Pinterest and used it to create some cute PJ bottoms out of fabric we selected at Joann’s. The process is pretty simple and the original author explains it way better than I could. But basically, you use a pair of pants your kid already has as a template for the new ones. You cut out the fabric in two pieces, one for each leg, folded, so the cutting is really easy. The pants are cuffed at the bottom, though she shows an option for making a ruffle too. I wish I’d done Tabby’s with the ruffle, but they were the first pair I did and I was a bit unsure of myself at that point. I also have some fabric for myself and I think there will be plenty leftover to make Tabby a pair from the same so maybe we can both have ruffles on those. Anyhow, they were super easy to make – maybe an hour? Even the first pair which I know I was slower at was pretty quick.

The coordinating tshirts are very similar to the applique tshirts I made them last year at Christmas time. To recap: purchase tshirt, use fusible interfacing to attach design to shirt, sew around edge of design. I had the kids pick what they wanted on their shirts (a shape, their initial, etc.) and then used the remaining PJ fabric to make the appliques. Super super simple and the kids are thrilled with them!

Salt Dough Ornaments

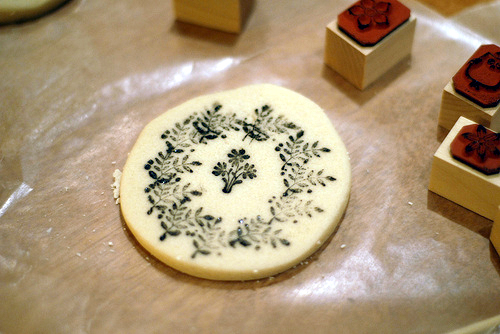
Last weekend, as part of our weekend festivities, we made salt dough ornaments with the kids. I’m sure I made them a few times as a kid, but I saw this pin on Pinterest and of course grabbed it for future reference. The pin image looked so much better than the painted messes of youth and it seemed so simple: make dough, stamp, bake. But when I delved further and actually looked at the pin link, it turns out it wasn’t salt dough at all but some sort of ceramic material. That is one of the bad things about Pinterest … you only have the word of the original pinner on what it is until you follow the link and read. But that’s one thing that’s great about Pinterest too, ideas build off one another. And so I decided to try it anyway with the salt dough.

Salt dough is super simple to make: 1 part salt, 2 parts flour, 1 part luke warm water (our parts were cups and that yielded dough for plenty of ornaments). Mix it up, knead it into dough. Ours seemed a bit sticky, so we added a bit more flour and got it to be the right consistency. This is much like bread dough … should stick a little, but not too much.

We rolled it, cut it and used stamps to decorate. The key with the stamps is to not press too hard because of course if you do you end up with a black square instead of a pretty stamp. A nice benefit of this is that you get a shallow indentation as well as ink mark. The effect is very nice. Then we used a skewer to make holes (Tabby also used the skewer to make little dots in hers) and baked at 200 FOREVER. Seriously, they’re still in my oven.

They turned out really cute and pretty similar to the original Pinterest photo. I’d love to experiment with some textures and I’d also like to have parchment on hand next time … the wax paper was eaten up by the salt in the dough and we couldn’t bake on it, so getting them off the cookie sheet was a might tricky, although they’re pretty strong.

Last word of advice … keep them away from your dog. Tabby found out the hard way that Loki likes the taste of salt ornaments, followed by a long visit to the toilet for some water.