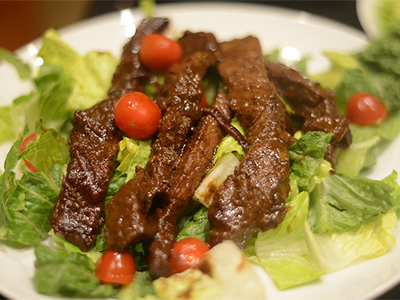
Sizzling Asian Steak Salad

sizzlingsteakI haven’t been great about posting recipes lately. It’s because I’ve been busy, not because I haven’t been cooking. We cook all the time. I think we have some sort of bizarre street cred at Ben’s school because he is always bringing semi-“bizarre” lunches. But I have resolved to continue putting up the recipes that our family enjoys the most for one little reason. Tabby asked me to.

Well she didn’t ask my specifically, but she said something to me a couple of weeks ago about teaching her how to cook and her being about to make food for herself when she leaves our house (she sometimes has strangely long-range planning for an almost-six-year-old). So I resolved to make sure I post the recipes that have caught our fancy and someday, I will make them into a book for the kids.

This recipe has been on our radar for a few months now. It comes to us from one of my favorite food bloggers, Iowa Girl Eats. It is changed VERY little because it is basically perfect as conceived, but I will adjust quantities and some instructions to reflect how we make it.

Sizzling Asian Steak Salad

Serves 4

Ingredients:

For the steak marinade:
1/4 C extra virgin olive oil
1/4 C  low-sodium soy sauce
2 T mirin (sweet Japanese cooking wine)
1 heaping T brown sugar
4 cloves garlic
24 oz strip steak, cut into bite-sized pieces

For the salad dressing:
1/4 C extra virgin olive oil
1/4 C low-sodium soy sauce
3 T honey
2 T lime juice
4 cloves garlic
2 teaspoons fresh ginger

For the salad:
1 small red onion, quartered and thinly sliced
12-16 cups baby spinach (or other lettuce)
1 pint grape or cherry tomatoes, halved
2 green onions, chopped

Directions:

This is a recipe made for the immersion blender! We stick all the ingredients for the marinade (except the steak, obviously) in a bowl and blend until smooth. It makes things super simple. But if you don’t have an iBlender, you can just grate or mince the garlic. Then you place the steak in a bag or a shallow dish and pour the marinade over it. 30 minutes or up to 2 hrs to marinate, stir halfway through. To make the dressing, you can do the same routine as the marinade. Place all ingredients in a bowl and iBlend or you will need to grate or mince the garlic and ginger and then whisk together or shake in a jar.

Once the steak is done marinating, heat a fry pan to medium high and then add the marinaded steak and onions. Saute for about 3-4 min per side (flank gets tough if you over-cook, so don’t!). Remove from pan and set aside. Combine salad greens, tomatoes and dressing (you will probably need less than 1/2 – just save the rest for next time) and toss until coated. Divide evenly amongst 4 plates, top with steak and green onions and ENJOY!

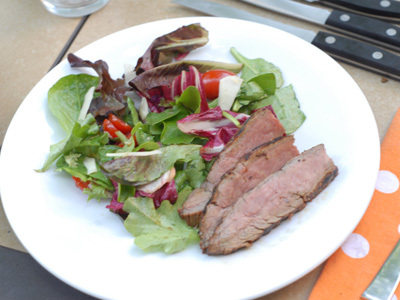
Balsamic Marinated Flank Steak

I’ve been pretty sluggish about May’s cookbook, which is Bobby Flay’s Boy Gets Grill. It has some tasty looking recipes in it, but it also leans more towards harder to find and more expensive ingredients, which I’m not against, of course, but it is harder to fit into my weekly cooking scheme. Flank steak, though, is always a good affordable treat and this recipe did NOT disappoint. The only hard part about it is that you will have to plan ahead since it takes 4-8 hours to marinate. It’s worth it though!

Balsamic Marinated Flank Steak with Spring Green Salad

adapted from Bobby Flay’s Boy Gets Grill

  • 1/2 C balsamic vinegar  + 2 T
  • 3/4 C olive oil + 3 T
  • 4 cloves garlic, chopped
  • 2 T rosemary leaves, chopped
  • 1 1/2  to 1 3/4 lb beef flank steak
  • Salt and pepper
  • 6 C spring greens
  • 1/2 lb cherry tomatoes, halved
  • 1/4 red onion very thinly sliced
  • parmesan cheese to top

Whisk together the half cup vinegar, the 3/4 C oil, the garlic and rosemary in a large dish. Add the steak and turn to coat. Cover and let marinate in the refrigerator for at least 4 hours and up to 8 hours, turning every 2 hours or whenever you happen to think about it.

Heat your grill to high. While it’s heating, prepare the salad. Whisk together the remaining 2 T vinegar and 3 T olive oil (I usually use much more balsamic than oil though – I like it better that way) and season with salt and pepper. Add the spring greens, tomatoes and onions and toss to coat. Top with shaved parmesan (vegetable peeler works great for shaving parmesan).

Remove the steak from the marinade and season with salt and pepper. Grill until lightly charred and kinda crusty, 4 to 5 minutes. Do not close the lid on your grill unless it is cold and/or windy. Turn steak over, reduce the heat to medium or move to a cooler part of the grill, and grill until medium-rare, 3 to 4 minutes more. If cooking a bigger steak, grill for an extra 1 to 2 minutes per side – take care  not to overcook!! Remove the steak to a cutting board and let rest for five minutes. Cut into half-inch thick slices against the grain of the meat. Serve meat alongside the salad.


The whole family loved this recipe, particularly our resident carnivore, Tabby. The salad was a nice light accompaniment.

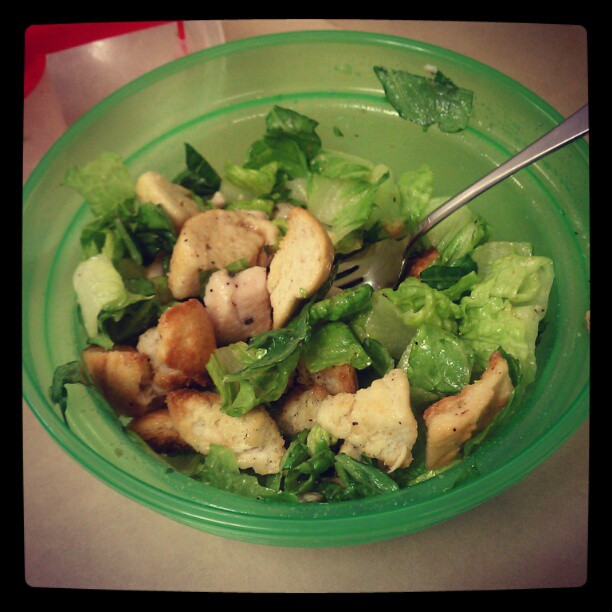
Chicken Caesar Salad

I debated even posting this recipe because we strayed so far from the original in Great Food Fast that it was really more of an inspiration than a recipe we followed. The original recipe called for making your own caesar dressing. I’m all for that, but we ended up making these for lunch and somehow homemade caesar is less appealing after hanging out in the breakroom fridge for a while, so I grabbed some stuff we had in the fridge and used that instead. I also try not to keep mayo (an ingredient in the dressing) in the house. It’s an ethical thing seeing as I hate mayo. But in the end, this is a really tasty and darn quick meal and I wanted to share it because it’s something that I love but never think about making. Maybe now you’ll think to make it too.

Chicken Caesar Salad

  • 4 oz Italian or French bread cut into 3/4 inch cubes (about 4 cups)
  • 3 T olive oil
  • coarse salt and ground pepper
  • 1 lb boneless skinless chicken breast, cut into bite-sized pieces
  • 18 – 20 oz romaine hearts
  • caesar dressing (either from a bottle or scratch – I’ll add that below)

Heat oven to 375. Place bread on a rimmed cookie sheet and drizzle with 2 T olive oil and season with S&P. Toss to coat. Bake, tossing now and then until golden, 12 to 15 minutes. Meanwhile, heat remaining tablespoon of oil over high heat in a skillet. Throw in your chicken and season with S&P as desired. Cook until a bit browned on the sides, stirring now and again with a spatula, about 3-4 minutes in all. Set aside.

Prep the romaine by slicing crosswise in 1-inch ribbons. Wash and dry (spin cycle). Toss with croutons, chicken and dressing. Enjoy!

If you want to make the dressing from scratch, Great Food Fast does it this way: put 1/4 C fresh lemon juice, 1/4 C reduced fat mayo, 1/4 C grated parm, 2 anchovy fillets and 1 small garlic clove in your blender and blend until smooth. Honestly, it sounds great, even with that evil mayo and I would love to try it next time.

This was also a great way to use up the extra bread left over from making the kids Berry French Toast this weekend. I already had the oven on from making the sugar cookies (they were the base of the fruit pizzas) and so I finished up the french toast and tossed in the croutons then stored them in an airtight container until we needed them. Just remembering to do little things like that makes putting together dinner (or lunch for the next day) so much easier!

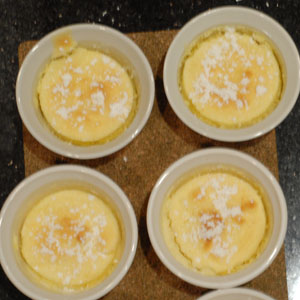
Lemon Pudding Cakes

I think my give-a-darn must have been broken last night when I was trying to make dinner. My parents brought the kids back to our house and I made the easiest meal ever, spaghetti, for  dinner and Matt whipped up this dessert, Lemon Pudding Cakes (from Great Food Fast, in case you’re in the dark). Spaghetti, being ridiculously easy to make, turned out great. And these turned out great as well, thanks to Matt being at the helm and not myself. I was unfortunately in charge of photographing them and that err … didn’t go so well.

But rest assured, despite the crappy photo over there, these are amazingly tasty and worth your time to make. They are also light and fresh and not a bit heavy. I believe they come in around 150 calories apiece too, so no guilt!

Lemon Pudding Cakes

ingredients

  • 2 tablespoons unsalted butter, melted
  • 1/3 C all-purpose flour
  • 1/2 t baking powder
  • 1/4 t fine salt
  • 3 large eggs, separated
  • 3/4 C granulated sugar
  • 1 t finely grated lemon zest
  • 1/3 C lemon juice (from 2 lemons)
  • 1 1/4 C whole milk
  • Confectioners’ sugar, for serving

Heat the oven to 350. Put kettle on to heat. Butter eight 6-ounce ramekins or custard cups. Set in a shallow baking pan.

In a medium bowl, combine flour, baking powder, and salt. In a large bowl, whisk together egg yolks with 1/2 cup granulated sugar until pale and smooth. Whisk in butter, lemon zest and juice, milk, and flour mixture.

In a large bowl, using an electric mixer, beat egg whites with 1/4 cup granulated sugar until stiff peaks form, 5 minutes; fold into batter. With a ladle, divide batter among ramekins, keeping sides clean if you can! Pour enough hot water (from the kettle) into baking pan to come halfway up sides of ramekins. Bake until cakes are puffed and slightly golden on top, 20-25 minutes. Dust with confectioners’ sugar and serve immediately.


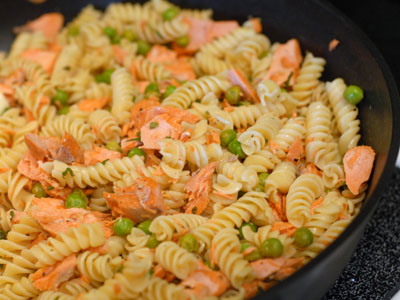
Pasta with Salmon, Peas and Mint

I frequently get a surprised reaction when I reveal that my kids like fish, but they do, like a LOT. We are met with squeals of delight when we mention fish is on the menu. I like this kind of weird! So I knew it was a pretty done deal when I selected this recipe from Great Food Fast to try out. Salmon is instantly popular and add pasta to it? Slam dunk. That’s the right basketball metaphor isn’t it? I’m more sure of football: TOUCH DOWN!

As an added bonus, we got to use the fresh mint from our garden and I am always a fan of that. Matt is constantly threatening to eradicate my precious mint before it takes over the neighborhood, but I say he’s a spoil sport. But I figure I better use it while I can and it grows so fast I can harvest virtually all the mint I want and still have tons left over.

Pasta with Salmon, Peas and Mint
adapted from Great Food Fast

Ingredients

  • 1 pound short pasta (rotini, farfalle, cavatappi, elbow macaroni?)
  • 1.5 lbs salmon (skin removed)
  • juice and zest of 2 lemons
  • 10 oz frozen peas, defrosted
  • 2 T unsalted butter
  • 1/4 cup chopped fresh mint plus more for serving

Cook pasta according to al dente. Reserve 1 C pasta water and return to pot. Meanwhile, season salmon with S&P and place in a large skillet. Add a 1/4 cup of water and the lemon juice and zest. Bring to a boil over medium high heat and steam for 10 minutes. Add peas and steam until they are tender, 2-3 more minutes.

Combine salmon, peas and cooking water with the pasta. Add butter, mint and season with S&P to taste. Stir gently breaking the salmon into large flakes. Add reserved pasta water for desired consistency. Serve topped with a little extra mint if you like.


This was a great recipe and just as tasty leftover as it was the evening we first made it. The kids devoured it and asked for seconds. I would like next time to add just a little cheese, perhaps Parmesan or Romano or maybe feta? just to see how it would be.

Pasta with Salmon, Peas and Mint

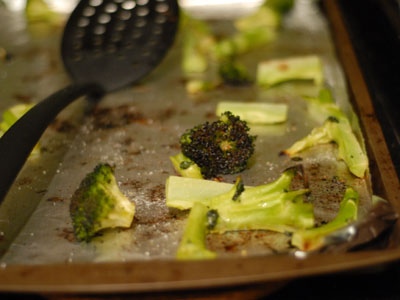
Broccamole!

Man, this week is kicking my butt. Long days at the office. Plenty of training to do (next race is in 12 days), kids have been … a bit on the frustrating side, house is a total mess. I don’t like feeling like this … under water, stressed. I like all my ducks in a row, all my plates spinning and it isn’t that way this week.

Well anyhow, enough of my whining. I’ve been wanting to share this recipe with you. A while back, I pinned and later tried a recipe for Crack Broccoli. It’s basically roasted broccoli with a little dressing and it is YUMMY. We’ve made it almost once a week since we first discovered it and it was Ben who came up with the name which we now use to refer to it: Broccamole! “Guacamole!” (presumably from “Holy Guacamole” is one of his favorite interjections and he charmingly bungled it into Broccamole! one night when we had this, and so now it is.

Broccamole

Ingredients

  • 1 large head broccoli
  • 3 Textra-virgin olive oil
  • 1 t kosher salt (or half as much table salt)
  • 1/2 t sugar

Line a cookie sheet with foil and place it in the oven. Heat the oven to 500 degrees. Cut broccoli into smallish florets and lightly peel the stems. Drizzle with the olive oil, sprinkle with salt and sugar and toss to combine. When the cookie sheet and oven are heated, remove the sheet from the oven. Work quickly and place all pieces of broccoli in a single layer on the sheet. Place as much of the surface area on the sheet as possible – this is where it will brown and be real tasty!

Put the sheet back in the oven and roast 9-10 minutes until broccoli is tender and lightly browned. Serve immediately with a drizzle of lemon juice if you’ve got a bit on hand.

Even if you don’t like broccoli you should really try this. Everyone in our house loves it!!

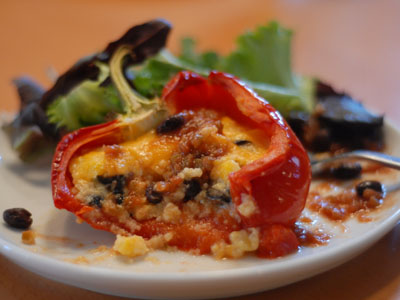
Polenta Stuffed Peppers

Hard to believe March is almost done! We always start out the month with the next month’s calendar page looking clear and end up with it jam-packed with activities. Next month we will celebrate Ben’s 3rd birthday, start new activities for each kid (Ben is doing tumbling, Tabby ballet), run our 7th (?!!) half marathon, have a visit from Matt’s mom and a big bunch of other activities, including prepping for our camping trip in May. I will also tackle the 4th cookbook of the year, Thai Street Food.

But March isn’t out just yet. And I have a couple of recipes left to share with you from Moosewood Simple Suppers. Today I bring you tales of polenta stuffed peppers. I am always a fan of stuffed veggies, be they squash or peppers or pumpkins! There is usually a bit more cooking time, but the prep is usually pretty easy and the results are usually delicious. This recipe was made doable even for a weeknight. You start cooking the peppers without stuffing, while you are prepping the stuffing, then stuff them and finish off the cooking. We opted to prep these the night before, but they easily could have been done in the evening.

Polenta Stuffed Peppers, adapted from Moosewood Simple Suppers

  • 4-5 red, orange or yellow bell peppers, sliced lengthwise through the stem, ribs and seeds removed
  • 2 T olive oil
  • 4 C water
  • 1/2 t red pepper flakes (optional)
  • 1 C cornmeal
  • 1.5 C corn kernels (frozen works fine)
  • 2 C cheddar cheese, divided
  • 1/2 C chopped olives (Spanish are recommended, but they do not seem to be readily available in my normal stores, and the kids LOVE black olives, so that’s what we used)
  • 16 oz salsa of your choice
  • can of black beans, drained

Heat oven to 450. Put 4 cups water in a medium sauce pan on high to boil, with red pepper flakes if desired. Rub peppers inside and out with olive oil (or use your mister if you’ve got one!) and roast at 450 for 15 minutes. While the peppers cook, prepare polenta. When water comes to a boil, slowly whisk in the cornmeal and continue cooking, stirring until tender and thickened.

Remove from heat and stir in 1 cup cheese, corn kernels, butter, and olives. Season with S&P to taste if desired. Fill peppers with polenta mixture and sprinkle with remaining cheese. Return to oven for 5-10 minutes until cheese is melted. While peppers cook, mix salsa and beans.

Serve peppers with beans and salsa on the side or over top. We also topped our green salads with the mixture and a little cheese – YUM.

For the kids, we cooked just the mixture in ramekins and topped them only with some beans (no salsa). Of course they each had to take a no-thank-you bite of the pepper. They’ll be up for it some day!!

Chicken Caesar Chalupas

We had such a nice weekend. It is rare that our weekends aren’t jam-packed with crap we must get done, but this one just had a handful of little events planned with longer stretches of nothingness going on in between. Friday I took the kids to the Zoo with my mom. It was a beautiful day and we had a wonderful time. Afterward, we went downtown and had lunch at Euclid Hall with my sister.

Saturday morning I got up and went running with my pal J … we pounded out 9 miles on Clear Creek and got good and caught up – we hadn’t seen each other in a long while. Matt was supposed to have come along as well, but unfortunately Ben woke up in the wee smalls throwing up everywhere. I hate it for him – he just got over a cold only to have this icky tummy bug hit him. He seemed mostly recovered yesterday, but had it on the other end all day today and was generally a bit lethargic.

Today was even more low key. We went to a birthday party in the morning, hit the grocery store on the way home, had naps and worked around the house a bit. The start of Dayligh Savings is kind of messing with our heads and when we suddenly looked at the clock and it was almost 6:30 we knew why our stomachs were grumbling.

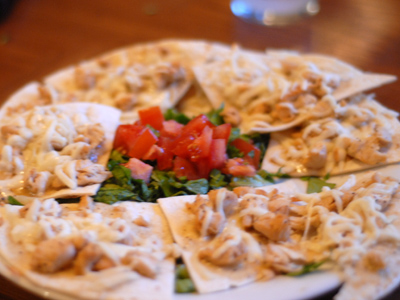
We whipped out the ingredients for Iowa Girl Eats’ Chicken Caesar Chalupas (found via Pinterest) and had them ready in a flash. We let the Sunday Dinner be a bit more low key and ate at the coffee table while we watched old episodes of Scooby Doo. Everyone enjoyed them, except Ben who is confined to BRAT until he recovers some more. They were very tasty and a good format for many meals, very similar to the tortilla pizzas we make routinely. We used ingredients on the healthier side of things (low carb tortillas, 2% cheese, lite salad dressing) to keep them on the lighter side.

Chicken Caesar Chalupas

  • tortillas
  • chicken breasts, chopped into bite-sized pieces
  • lemon pepper + salt
  • cooking spray
  • Caesar salad dressing
  • shredded mozzarella
  • romaine lettuce, chopped
  • tomatoes chopped

Directions

Heat oven to 400. Spray baking sheet with cooking spray. Spray skillet with cooking spray and heat on medium high. Season both sides of chicken with lemon pepper and salt. Brown chicken in skillet until done. Cut tortillas into wedges (scissors work great!) and place on cooking sheet. Spray tops with cooking spray and bake for a couple of minutes until toasty. Top tortillas with a bit of dressing, chopped chicken and mozzarella. Return to oven and bake a couple more minutes to melt cheese. Serve with romaine and tomatoes for scooping.

Nannersp
Check out all the other great Pinteractive Projects on Nannette’s site!

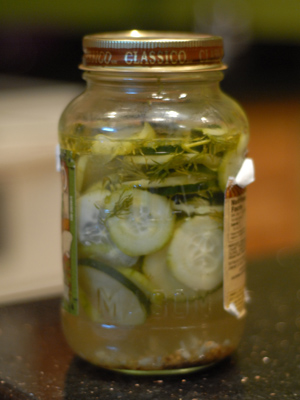
Refrigerator Pickles

Have I mentioned how big a deal dill pickles are at our house?? Everyone LOVES them. Except Matt because he’s weird. They are a favorite snack and we even have a specially made vintage Tupperware Pickle container for them that lives in the fridge, filled with mini gherkin goodness.

Since doing some canning last year, I’ve thought a couple of times about drying to make our own pickles. With the acidity level of pickles being pretty high (thanks to the vinegar) they would not require a pressure canner, but just a water-bath canning method. Anyhoo, as far as things to do, it’s pretty far down on the list, but then I saw a recipe on Pinterest for refrigerator pickles! They only last for a couple of weeks, but the way we go through pickles, that is NO problem. So we gave them a shot.

Super easy, super tasty, a TOTAL hit. Here’s how we dunit.

Refrigerator Dill Pickles

Ingredients

  • 2 lbs cucumbers (recipe called for “kirby” cucumbers – I used the grocery store standard, sliced 1/4 inch thick
  • 1.5 cups distilled white vinegar
  • 4t kosher salt
  • 1/3 C sugar
  • 1 t mustard seeds
  • 1 t coriander seeds (we could not find this and instead used ground coriander instead)
  • 3/4 t dill seeds
  • 3/4 C chopped fresh dill
  • 3 cloves garlic coarsely chopped

Directions

Combine vinegar, salt, sugar, mustard seeds, coriander seeds and dill seeds in a bowl and mix to combine. Cover with two cups hot water and stir until salt and sugar have dissolved and liquid is clear. Let cool to room temperature.

Toss together cucumbers, dill and garlic. A note on the cucumbers: the recipe did not say whether to peel or not, so we did two cucumbers peeled and one not peeled. They both seemed equally tasty and the peel provides a nice color and presumably some fiber, so I’d not bother with peeling next go-around. Pour the brine over the cucumber mixture and place a plate or similar on top to keep the cucumbers submerged in the brine.

Cover with plastic wrap and refrigerate overnight, stirring once or twice if you happen to think of it (we didn’t, they were delicious anyhow). Transfer to a jar the next day and enjoy for the next two weeks – if they last that long!


Nannersp
Check out the other great Pinteractive Projects on Nannette’s Site

Strawberry Limeade Smoothie and Feb Cookbook Wrap-up

Well February has just about come and gone, and with it my plans to review eight recipes from The Biggest Loser Family Cookbook. I didn’t quite make all of them this go-around, but I gave it a good shot! Hopefully we’ll do a bit better next go around. The good news is that I did enjoy most of the recipes we made and I would like to try the few that we missed and maybe some more. Continue reading “Strawberry Limeade Smoothie and Feb Cookbook Wrap-up”