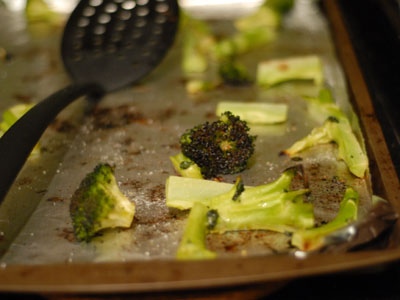
Broccamole!

Man, this week is kicking my butt. Long days at the office. Plenty of training to do (next race is in 12 days), kids have been … a bit on the frustrating side, house is a total mess. I don’t like feeling like this … under water, stressed. I like all my ducks in a row, all my plates spinning and it isn’t that way this week.

Well anyhow, enough of my whining. I’ve been wanting to share this recipe with you. A while back, I pinned and later tried a recipe for Crack Broccoli. It’s basically roasted broccoli with a little dressing and it is YUMMY. We’ve made it almost once a week since we first discovered it and it was Ben who came up with the name which we now use to refer to it: Broccamole! “Guacamole!” (presumably from “Holy Guacamole” is one of his favorite interjections and he charmingly bungled it into Broccamole! one night when we had this, and so now it is.

Broccamole

Ingredients

  • 1 large head broccoli
  • 3 Textra-virgin olive oil
  • 1 t kosher salt (or half as much table salt)
  • 1/2 t sugar

Line a cookie sheet with foil and place it in the oven. Heat the oven to 500 degrees. Cut broccoli into smallish florets and lightly peel the stems. Drizzle with the olive oil, sprinkle with salt and sugar and toss to combine. When the cookie sheet and oven are heated, remove the sheet from the oven. Work quickly and place all pieces of broccoli in a single layer on the sheet. Place as much of the surface area on the sheet as possible – this is where it will brown and be real tasty!

Put the sheet back in the oven and roast 9-10 minutes until broccoli is tender and lightly browned. Serve immediately with a drizzle of lemon juice if you’ve got a bit on hand.

Even if you don’t like broccoli you should really try this. Everyone in our house loves it!!

Halfway Cookies

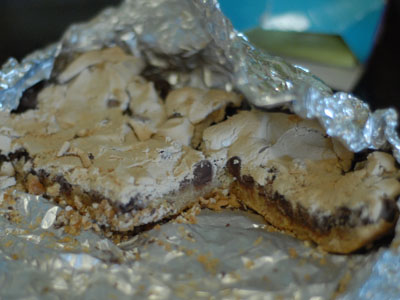
I knew when I pinned this recipe for Halfway Cookies that I would have to try it. I almost overlooked it on Friday when we were trying to figure out a dessert when we were having my family to dinner but I noticed it at the last moment and I am SO SO glad I did. It is by far one of the best desserts I’ve ever tried … a little salty in with the sweet, a delightful crunch with the meringue and very much like a chocolate chip cookie in other ways. WONDERFUL. I am sure I will be making these regularly for a long time to come.

Halfway Cookies

Ingredients

  • 2 cups flour
  • 1 teaspoon salt
  • 1/4 teaspoon baking soda
  • 1 teaspoon baking powder
  • 1/2 cup unsalted butter, softened
  • 1/2 cup granulated sugar
  • 1 1/2 cup brown sugar, divided
  • 2 eggs, separated
  • 1 tablespoon water
  • 1 teaspoon vanilla
  • 12 ounces semi-sweet chocolate chips

Heat oven to 350°. Cut two pieces of aluminum foil and fold them to match the width of the pan. Criss cross them each direction of the pan so that the bars will be easily lifted out. Spray aluminum foil with non-stick spray. Whisk together the flour, salt, baking soda, and baking powder in a small bowl. In a mixer, cream together the butter, the granulated sugar and just 1/2 cup of the brown sugar until it looks like smooth frosting. Separate the eggs, reserving the whites. Mix the yolks into the butter-sugar mixture one at a time until they are completely absorbed, then mix in the water and vanilla. With the mixer at a low speed, add the flour mixture and beat gently until all the flour has been absorbed and the dough looks crumbly.

Press the cookie dough gently into the pan with your hands, making sure the surface is even. Sprinkle the chocolate chips on top of the cookie dough and press them slightly into the dough. This will help keep them from moving when you add the meringue.

Using a mixer with a clean bowl and a whisk attachment, start whisking the egg whites. Gradually increase speed to medium-high. When the egg whites are very frothy and look like loose foam, start adding the remaining cup of brown sugar a little at a time. Continue increasing speed to the highest setting. When all the sugar has been added, continue whipping the meringue until it it comes to soft peaks. It should look like “glossy, soft-serve ice cream.”

Spread the meringue down the middle of the pan. It is really sticky and pretty hard to work with. Use a spatula to gently spread the meringue from the middle to the edges. When you get it too thin it disturbs the chocolate chips, so be careful. I think it might be worth it to add another egg white and maybe a bit more brown sugar to make just a little more meringue.

Cover pan with parchment paper to prevent scorching and bake for 20 minutes, then remove the parchment. Continue baking for an additional 5-10 minutes, until the edges look toasted and are pulling away from the sides of the pan. Cool completely, lift out and cut into bars.

Ooh, ahh, drool and ENJOY. With milk, if you please! The recipe says you can replace the chocolate chip layer with lots of other things like butterscotch chips, jam, dried fruit, maybe coconut??

Nannersp
Check out everyone’s great Pinteractive Posts on Nanette’s site!

Polenta Stuffed Peppers

Hard to believe March is almost done! We always start out the month with the next month’s calendar page looking clear and end up with it jam-packed with activities. Next month we will celebrate Ben’s 3rd birthday, start new activities for each kid (Ben is doing tumbling, Tabby ballet), run our 7th (?!!) half marathon, have a visit from Matt’s mom and a big bunch of other activities, including prepping for our camping trip in May. I will also tackle the 4th cookbook of the year, Thai Street Food.

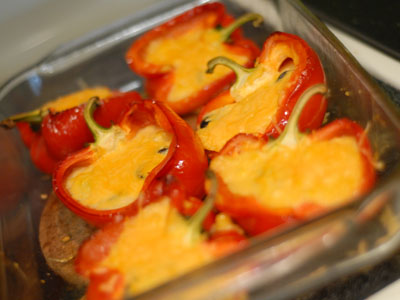
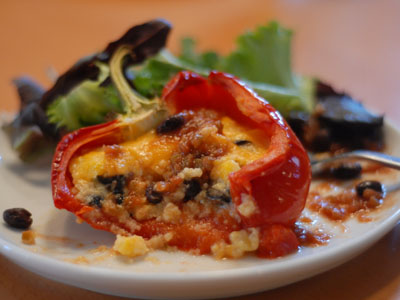
But March isn’t out just yet. And I have a couple of recipes left to share with you from Moosewood Simple Suppers. Today I bring you tales of polenta stuffed peppers. I am always a fan of stuffed veggies, be they squash or peppers or pumpkins! There is usually a bit more cooking time, but the prep is usually pretty easy and the results are usually delicious. This recipe was made doable even for a weeknight. You start cooking the peppers without stuffing, while you are prepping the stuffing, then stuff them and finish off the cooking. We opted to prep these the night before, but they easily could have been done in the evening.

Polenta Stuffed Peppers, adapted from Moosewood Simple Suppers

  • 4-5 red, orange or yellow bell peppers, sliced lengthwise through the stem, ribs and seeds removed
  • 2 T olive oil
  • 4 C water
  • 1/2 t red pepper flakes (optional)
  • 1 C cornmeal
  • 1.5 C corn kernels (frozen works fine)
  • 2 C cheddar cheese, divided
  • 1/2 C chopped olives (Spanish are recommended, but they do not seem to be readily available in my normal stores, and the kids LOVE black olives, so that’s what we used)
  • 16 oz salsa of your choice
  • can of black beans, drained

Heat oven to 450. Put 4 cups water in a medium sauce pan on high to boil, with red pepper flakes if desired. Rub peppers inside and out with olive oil (or use your mister if you’ve got one!) and roast at 450 for 15 minutes. While the peppers cook, prepare polenta. When water comes to a boil, slowly whisk in the cornmeal and continue cooking, stirring until tender and thickened.

Remove from heat and stir in 1 cup cheese, corn kernels, butter, and olives. Season with S&P to taste if desired. Fill peppers with polenta mixture and sprinkle with remaining cheese. Return to oven for 5-10 minutes until cheese is melted. While peppers cook, mix salsa and beans.

Serve peppers with beans and salsa on the side or over top. We also topped our green salads with the mixture and a little cheese – YUM.

For the kids, we cooked just the mixture in ramekins and topped them only with some beans (no salsa). Of course they each had to take a no-thank-you bite of the pepper. They’ll be up for it some day!!

Shrimp Curry with Snow Peas

We are getting real close to the end of March! But happily, I’ve been quite good about working my way through Moosewood’s Simple Suppers and we’ve done 5/8 recipes from the book so far (though I haven’t posted one of them). This weekend and next week I’ll wrap up the rest and then it’s on to the Thai Street Food cookbook.

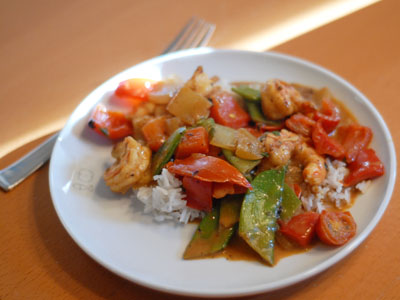
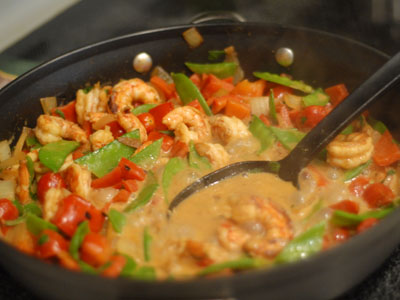
Tuesday night, we made the tasty little curry pictured above. Like everything from this book, it went together very fast. I didn’t think to time this one, but I would bet it was on the table in under 30 minutes. Our rice cooker actually took longer to cook the rice than I did to make the curry. These recipes have all been very doable on a weeknight, which I love. Love. LOVE.

Shrimp Curry with Snow Peas

adapted from Moosewood Simple Suppers

  • 1 lb shrimp, peeled and deveined
  • 5 oz snow peas, cut in half diagonally
  • 1 lg onion, sliced thin (I dice mine as I detest stringy things in my stirfrys)
  • 2 C chopped tomatoes
  • 2 red bell peppers chopped into bite sized pieces
  • 1 T oil
  • 2 T curry powder
  • 14 oz can coconut milk (look for lite – taste is good and way healthier)
  • juice of one lime
  • 1/4 C chopped thai basil, sweet basil or cilantro
  • 1/2 t salt

Heat oil over medium high heat in a large skillet. Add onion and peppers and cook about 5 minutes or until they start to soften and the onions turn translucent. Add the shrimp and curry powder and stir well to prevent sticking. Add the snow peas and tomatoes and cook for a few minutes until the shrimp have started to turn pink. Add the coconut milk, lime juice, salt and chopped basil and bring to a simmer. Turn shrimp to cook to even pinkness. Season with additional salt and pepper to taste.

Serve over rice or maybe noodles.

I loved the way this looked and smelled while it was cooking. Such vibrant colors! When we first served it, it seemed a bit bland, but just a hint more salt really brought out all the flavors and Matt and I both enjoyed it a lot. The kids? Not quite as much … they chowed down on the shrimp and snow peas and liked the sauce, but they were a bit suspicious of the peppers and onions. Tabby is convinced that pepper=hot right now. OY.

Po’ Boy Sandwiches

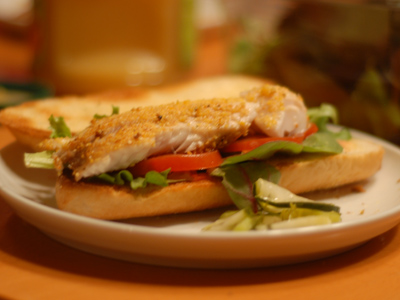
We have been having a great time trying out the recipes from Moosewood Simple Suppers. This one was one I probably wouldn’t have tried on my own, but a friend from work who I first pointed towards Moosewood cookbooks, tried this one out and was raving, so I gave it a go. It was like so many things Moosewood. Simple, but so so tasty.

Po’ Boy Sandwiches

  • 4-6 filets of firm white fish (we used tilapia)
  • 1/4 C corn meal
  • 1 T butter or olive oil
  • 1 tsp old bay or other seafood seasoning
  • 4-6 rolls
  • mayo and ketchup or tartar sauce
  • lettuce and tomatoes
  • thinly sliced onions

Directions

Mix together the cornmeal and seasoning. Pat dry the fish fillets and dredge them in the cornmeal mixture. Heat the butter or olive oil over medium high heat in a large skillet. Place the fish in the skillet in a single layer and cook for about three minutes per side flipping only once, until cooked through and flaking when piereced with a fork.

Serve the fish on the rolls spread with tartar sauce or a mixture of mayo and ketchup. Garnish with lettuce, tomatoes and onions. We had our homemade pickles on the side and these would be great with some potato chips or something similar.

Everyone in the family loved this, though only Matt and I ate these as sandwiches. The kids just dug into the fillets and the two extra I’d made for leftovers wound up in happy little bellies.

Chicken Caesar Chalupas

We had such a nice weekend. It is rare that our weekends aren’t jam-packed with crap we must get done, but this one just had a handful of little events planned with longer stretches of nothingness going on in between. Friday I took the kids to the Zoo with my mom. It was a beautiful day and we had a wonderful time. Afterward, we went downtown and had lunch at Euclid Hall with my sister.

Saturday morning I got up and went running with my pal J … we pounded out 9 miles on Clear Creek and got good and caught up – we hadn’t seen each other in a long while. Matt was supposed to have come along as well, but unfortunately Ben woke up in the wee smalls throwing up everywhere. I hate it for him – he just got over a cold only to have this icky tummy bug hit him. He seemed mostly recovered yesterday, but had it on the other end all day today and was generally a bit lethargic.

Today was even more low key. We went to a birthday party in the morning, hit the grocery store on the way home, had naps and worked around the house a bit. The start of Dayligh Savings is kind of messing with our heads and when we suddenly looked at the clock and it was almost 6:30 we knew why our stomachs were grumbling.

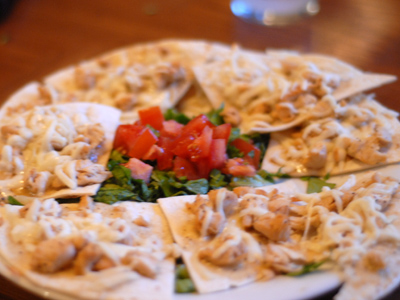
We whipped out the ingredients for Iowa Girl Eats’ Chicken Caesar Chalupas (found via Pinterest) and had them ready in a flash. We let the Sunday Dinner be a bit more low key and ate at the coffee table while we watched old episodes of Scooby Doo. Everyone enjoyed them, except Ben who is confined to BRAT until he recovers some more. They were very tasty and a good format for many meals, very similar to the tortilla pizzas we make routinely. We used ingredients on the healthier side of things (low carb tortillas, 2% cheese, lite salad dressing) to keep them on the lighter side.

Chicken Caesar Chalupas

  • tortillas
  • chicken breasts, chopped into bite-sized pieces
  • lemon pepper + salt
  • cooking spray
  • Caesar salad dressing
  • shredded mozzarella
  • romaine lettuce, chopped
  • tomatoes chopped

Directions

Heat oven to 400. Spray baking sheet with cooking spray. Spray skillet with cooking spray and heat on medium high. Season both sides of chicken with lemon pepper and salt. Brown chicken in skillet until done. Cut tortillas into wedges (scissors work great!) and place on cooking sheet. Spray tops with cooking spray and bake for a couple of minutes until toasty. Top tortillas with a bit of dressing, chopped chicken and mozzarella. Return to oven and bake a couple more minutes to melt cheese. Serve with romaine and tomatoes for scooping.

Nannersp
Check out all the other great Pinteractive Projects on Nannette’s site!

Banana Cupcakes

For Tabby’s birthday dessert she wanted Dirt Dessert. With all of the processed this and that, it is not something I would normally condone, but what the heck? You only turn five once, so that is what we made. But she also got to bring a treat to school to share with her friends during snack time, so I gently steered her toward a couple of dessert choices from Moosewood Simple suppers. Of the options available, she chose Banana Cupcakes. That broke my heart. Err … not.

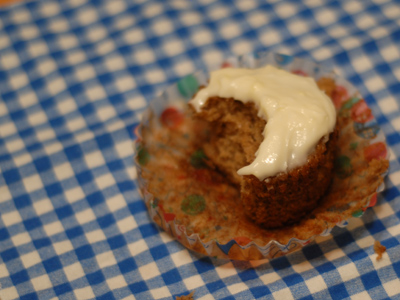
These cupcakes are some of the best I’ve ever had. They are quite a bit like banana bread and very moist. They would be excellent without the frosting, but we added just a touch for presentation’s sake and it didn’t detract either. The kids in Tabby’s class were raving fans as well, I’m told. Continue reading “Banana Cupcakes”

Spinach Cheese Burritos and March Cookbook

So I’m already three recipes into the March cookbook, Moosewood’s Simple Suppers and as expected, I’m finding it delightful. Moosewood, for the uninitiated is a fairly famous co-op restaurant in Ithaca, NY. Basically a group of hippies came together to make awesome, tasty, whole food that is frequently vegetarian, though they do use fish here and there. The restaurant pioneered a lot of creative vegetarian cooking. Though I did not grow up vegetarian, some of our extended family is vegetarian or pescetarian and we were exposed to these recipes through them and my mom owned and sometimes cooked from the original Moosewood cookbook. When Matt and I were married, I received Moosewood New Classics from my mom’s cousin and when everything I tackled from it from it turned out awesome, I bought the original (with hand-drawn illustrations) and some others. Just a few years ago my sister gave me the latest in the series, Simple Suppers. But of course I’ve been busy and internet recipes are distracting, so this is a prime opportunity for checking out all of the whole food goodness Moosewood has to offer.

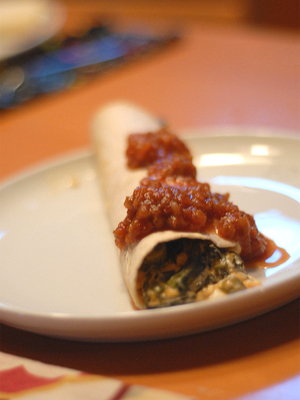
The first recipe I tried was Spinach Cheese Burritos. This little gem went from prep (including chopping) to oven in exactly 20 minutes – I timed it. The original recipe has a hot sauce that you can make in the blender, but I am such a fan of the organic salsa we buy at Costco, that I served it with that instead. I also used low-carb tortillas because that’s how we roll. This is one I dare anyone not to like. It is creamy, cheesy and delicious. The kids were a bit suspicious of the green stuff, but both ate about half their burrito which is not bad in my book!

Spinach Cheese Burritos

  • 8-10 flour tortillas
  • 3 cups monterey jack or cheddar cheese (pepper jack would be awesome here too), shredded
  • 1/3 C cream cheese (3 oz)
  • 10 oz fresh baby spinach
  • 1 bunch scallions, chopped
  • 1 T cooking oil
  • 3 cloves garlic, chopped
  • 1 tsp ground coriander
  • 1 pinch nutmeg
  • salsa of your choice for serving

Directions

Heat oven to 350. Lightly oil a 9×13″ baking dish. In a large skillet over medium-high heat, cook scallions and garlic in oil for 2-3 minutes. Add in the spinach and cook until the leaves have wilted and there isn’t water left in the bottom of the pan. Remove from the heat and stir in cheese and spices thoroughly, using the residual heat to melt everything together.

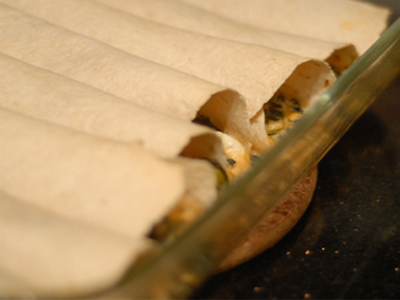
Place a good bit of filling on the edge of each tortilla and roll, then place in the pan seam-side down. Cover with foil and bake for about 20 minutes. Serve immediately with generous quantities of salsa.

Along with this little gem, there are seven other recipes from this cookbook I’m testing out. A preview of what’s (hopefully) to come:

  1. Spinach Cheese Burritos
  2. Banana Cupcakes (we made these for Tabby’s class on Monday night – mmmmmm)
  3. Po’ Boys (had these last night – awesome!!)
  4. Winter Squash Pie
  5. Mexican Polenta Stuffed Peppers
  6. Creamy Lemon Pasta
  7. Shrimp Curry with Snow Peas
  8. Baked Tofu

Refrigerator Pickles

Have I mentioned how big a deal dill pickles are at our house?? Everyone LOVES them. Except Matt because he’s weird. They are a favorite snack and we even have a specially made vintage Tupperware Pickle container for them that lives in the fridge, filled with mini gherkin goodness.

Since doing some canning last year, I’ve thought a couple of times about drying to make our own pickles. With the acidity level of pickles being pretty high (thanks to the vinegar) they would not require a pressure canner, but just a water-bath canning method. Anyhoo, as far as things to do, it’s pretty far down on the list, but then I saw a recipe on Pinterest for refrigerator pickles! They only last for a couple of weeks, but the way we go through pickles, that is NO problem. So we gave them a shot.

Super easy, super tasty, a TOTAL hit. Here’s how we dunit.

Refrigerator Dill Pickles

Ingredients

  • 2 lbs cucumbers (recipe called for “kirby” cucumbers – I used the grocery store standard, sliced 1/4 inch thick
  • 1.5 cups distilled white vinegar
  • 4t kosher salt
  • 1/3 C sugar
  • 1 t mustard seeds
  • 1 t coriander seeds (we could not find this and instead used ground coriander instead)
  • 3/4 t dill seeds
  • 3/4 C chopped fresh dill
  • 3 cloves garlic coarsely chopped

Directions

Combine vinegar, salt, sugar, mustard seeds, coriander seeds and dill seeds in a bowl and mix to combine. Cover with two cups hot water and stir until salt and sugar have dissolved and liquid is clear. Let cool to room temperature.

Toss together cucumbers, dill and garlic. A note on the cucumbers: the recipe did not say whether to peel or not, so we did two cucumbers peeled and one not peeled. They both seemed equally tasty and the peel provides a nice color and presumably some fiber, so I’d not bother with peeling next go-around. Pour the brine over the cucumber mixture and place a plate or similar on top to keep the cucumbers submerged in the brine.

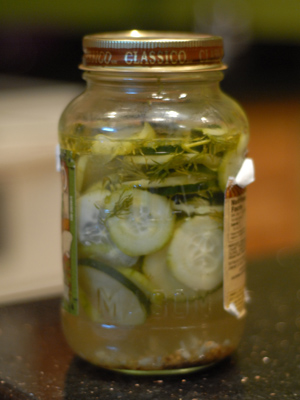
Cover with plastic wrap and refrigerate overnight, stirring once or twice if you happen to think of it (we didn’t, they were delicious anyhow). Transfer to a jar the next day and enjoy for the next two weeks – if they last that long!


Nannersp
Check out the other great Pinteractive Projects on Nannette’s Site

Strawberry Limeade Smoothie and Feb Cookbook Wrap-up

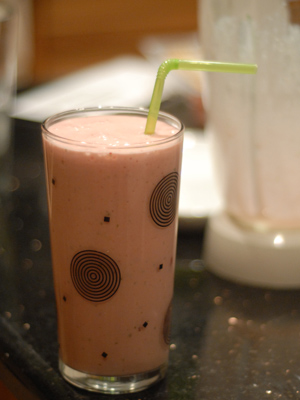
Well February has just about come and gone, and with it my plans to review eight recipes from The Biggest Loser Family Cookbook. I didn’t quite make all of them this go-around, but I gave it a good shot! Hopefully we’ll do a bit better next go around. The good news is that I did enjoy most of the recipes we made and I would like to try the few that we missed and maybe some more. Continue reading “Strawberry Limeade Smoothie and Feb Cookbook Wrap-up”