Tabby is getting to the point where she needs more to read than just sight words, but finding her books that are age appropriate and worth reading – let’s just say I’m not big on Fairy Princess Barbie books – is pretty darn hard. So when I saw Playdough to Plato’s great idea of making your own Easy Reader books, I knew I had to give it a go. I thought of going with the paper model, maybe putting it together in InDesign and printing it out, but then I thought that maybe I could make a Kindle Book! I’m techie, how hard could it be?? Turns out, happily, not very hard. Here’s how you do it.
A couple of notes: first of all, I did this on my Windows based PC. It looks like it would work for a Mac, but I don’t know and I don’t have a way to test. Also, from what I’ve read, the resulting file would work on a variety of eReaders, but since I only have a Kindle Fire, that’s all I’ve tested the file on. This is the method that worked for me and I’ve had no problems with it, but mileage may vary, etc. I am happy to have any feedback from you and I will try to help if I can!
First, you’ll need some software. You’ll use MS word to make your book and some sort of graphic editing software for the cover (if you want one). You’ll also need to download and install MobiPocket and KindleGen. MobiPocket is a pretty typical install, but KindleGen is less so – you get a zip file and you just need to unzip it into its own folder and then copy that folder somewhere you can access it easily, like possibly the C: drive (sorry Mac folks, I don’t know what the equivalent is) or in my case, my user folder, which is C:\users\jessn.
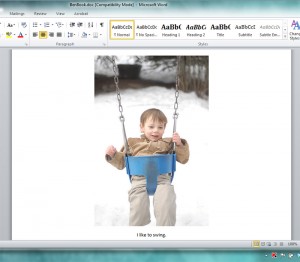
You start out by making a Word document with your story. You’ll need to paste in your photos as JPGs and center them and your text. These images can and should be pretty small … I used about 300×400 px images. You can make a title page and dedication and all that. Just put in page breaks wherever you want them. Don’t worry too much about the font since that gets handled by the eReader. Save the file as .doc – it cannot be saved as .docx or you can’t use it. Then you can also make a cover page. 800×600 pixels seems to work well. Save that as a jpg.
 Next you’ll open up MobiPocket Creator. You’ll import a MS Word Document.
 Make sure the file is not still open in Word and go ahead and click import.
 Once the Word doc is imported, then you can make further changes to the eBook, some of the fun stuff like adding a cover, etc.
 Once you click on the cover tab, you can import your jpg into the eBook. Make sure you click update or it will not become part of your eBook.
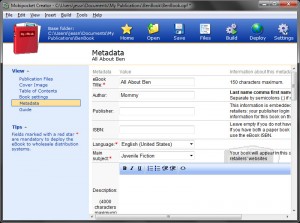 You can edit any other sections you like, but probably the most important part is metadata. You can add the title, author, subject, etc. Once again, make sure you click Update to save these files.
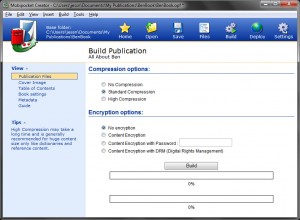 Next, you can click on “Build” at the top. Here are the encryption options. I don’t change anything here, I just click “Build.”
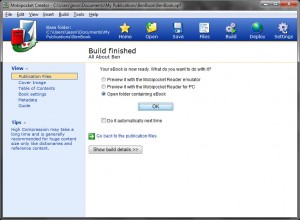 Once the book is built, you’ll see this screen. Select the option to Open the folder containing the eBook and click OK.
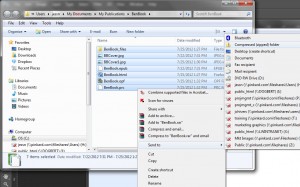 So then you’ll see the folder that MobiPocket has put the eBook and its corresponding files into. This is typically in a MyPublications folder, which is a sub-folder of MyDocuments. Next you’ll want to take all these files and zip them together. So highlight all the files in the folder and right click and select “Send to Zip.” This will create a zip archive called <Folder Name>.zip. You’ll want to rename it to something that ends in “.epub” – Windows will give you a dialog box about messing up the file if you change the extension. It won’t, so just go ahead.
So now that you have your .epub file, you need to copy it to the same place you put the KindleGen files. c:\KindleGen or wherever.
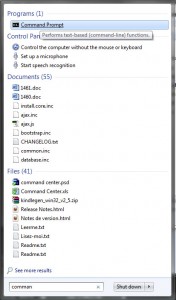 Next step is to turn that guy into a .mobi for your Kindle. This is where the KindleGen software comes in. You will want to go to the Command Prompt. Way back in the dark days of computers this is how we all did our computing. Do you remember?? Anyhow, you access the command prompt these days via the start menu. It’s in there somewhere. In Win 7, you can just start typing “command prompt” and it will show up in the list and you can click it.
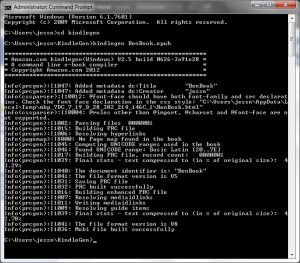 So you’ll find yourself at the black screen and what you have to do is get to your KindleGen folder. This is why I put mine in c:\users\jessn – my command prompt, for whatever reason goes there when you start it, so all I have to type is “cd KindleGen” which is DOS speak for “change directory to KindleGen.” Once you’re in your KindleGen folder, you just have to execute the KindleGen and it’s as simple as typing “kindlegen <myfile>.epub” and hitting enter. It will spit out a bunch of stuff as it processes the file and hopefully the last line will read “Mobi file built successfully.”
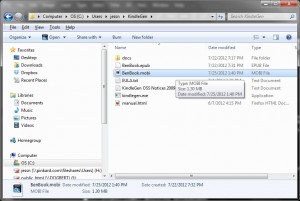 Now if you have a look in that KindleGen folder, you should see, in addition to your <mybook>.epub, a <mybook>.mobi and that’s the file that you will transfer to your Kindle! You can hookup your Kindle USB and transfer this file to your “Documents” folder and then when you look in the Documents section, voila! There it is.
I know this is a long tutorial and I really hope it doesn’t intimidate. It honestly takes me about 5 minutes from the time I’m done with the book and the cover to make the .mobi, maybe less. So please try it, and like I said, if you have issues, drop me a line. I don’t bite, promise. jmkafer[at]yahoo[put dot here]com


Great idea. Thank you.