Friday Favorites May 3, 2013

sewingcards
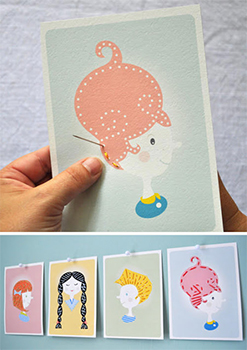
Favorite Printable: Tabby has been really into wanting to learn to sew – think she might get into these cute sewing practice cards!

pulledpork
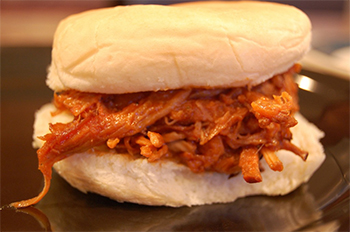
Favorite Savory Delight: We are having quite a few people over on Tuesday and I think some pulled pork in the crockpot is the perfect dinner solution!

grumpymonet
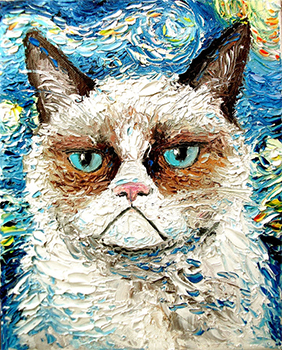
Favorite Funny: I do love Grumpy Cat and I saw this great painting on Etsy … I’m very tempted. It makes me laugh.

utahparksFavorite Daydream: This is actually a bit more in reality than the normal – we’re hoping to head to Utah next summer for a family road trip and this looks like a great book of hikes to do with the kids!

nutellapopcicles
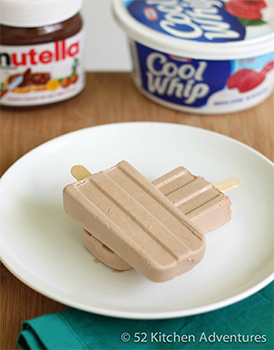
Favorite Sweet Treat: Look at these nutella popicles – just three ingredients. YUM.

vadering
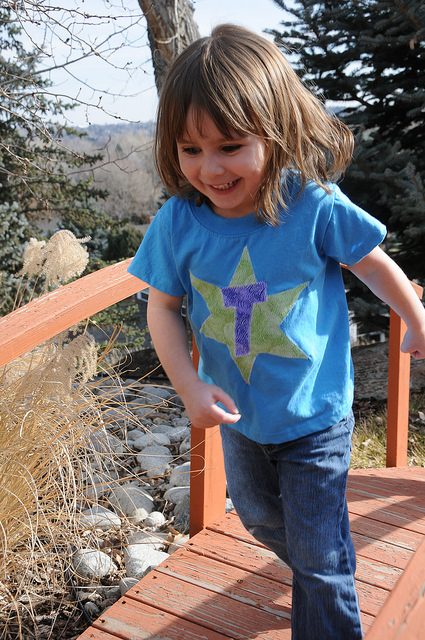
Favorite Photo Fun: Owling? Planking? Move over – Vadering! Think I could get the kids to do this.

absFavorite Workout: Moves for below the bellybutton … surely I don’t need this? Nah.

blender

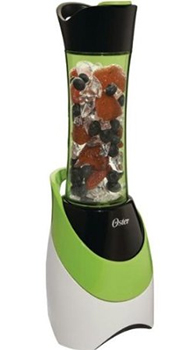
Favorite Purchase: I bought this guy a couple of months ago, but it wasn’t really smoothie season then. Now it is (sorta) and I’ve been using it every day to make awesome spinach smoothies. Very happy with it. cutthetimetravelFavorite App: The latest installment of Cut the Rope is great! It’s one of those apps that everyone in the family loves – cute graphics and fun problem solving.

Christmas PJs

I’ve been having too much fun to post very much! It’s been a whirlwind past few days but so nice. I’m pretty much resigned myself to the fact that I won’t be getting more than 6 hours of sleep until Christmas is over and I think I’m OK with that. Santa is almost done with his projects and mommy finished up a big one this weekend. I made my kiddos Christmas jim-jams!!

I found a great tutorial via Pinterest and used it to create some cute PJ bottoms out of fabric we selected at Joann’s. The process is pretty simple and the original author explains it way better than I could. But basically, you use a pair of pants your kid already has as a template for the new ones. You cut out the fabric in two pieces, one for each leg, folded, so the cutting is really easy. The pants are cuffed at the bottom, though she shows an option for making a ruffle too. I wish I’d done Tabby’s with the ruffle, but they were the first pair I did and I was a bit unsure of myself at that point. I also have some fabric for myself and I think there will be plenty leftover to make Tabby a pair from the same so maybe we can both have ruffles on those. Anyhow, they were super easy to make – maybe an hour? Even the first pair which I know I was slower at was pretty quick.

The coordinating tshirts are very similar to the applique tshirts I made them last year at Christmas time. To recap: purchase tshirt, use fusible interfacing to attach design to shirt, sew around edge of design. I had the kids pick what they wanted on their shirts (a shape, their initial, etc.) and then used the remaining PJ fabric to make the appliques. Super super simple and the kids are thrilled with them!

Tshirt Dresses

That girl child of mine … she LOVES her dresses. She would probably wear dresses all the time if she could. Well dresses and jeans … she does love her jeans. Anyhow, while we were in NYC I wanted to get her a cute souvenir t’shirt, but I couldn’t find ANY that weren’t A) ugly B) cheesy C) ridiculously priced D) made from terribly coarse fabric. But somewhere rattling around upstairs was the notion that I’d seen on the internets somewhere that one can make an adult’s t’shirt into a dress. So on this leap of memory faith, I purchased a hot pink ladies I ♥ NY t’shirt for Miss Tabby. The exchange with the Indian (Syrian???) guy at the booth was hilarious. He saw me holding it up to her to see how it would fit and kept insisting he had ones that would fit her better (they had child-esque drawings of NYC on them and were the SCRATCHIEST fabric I’ve ever handled) and I could not communicate that I didn’t WANT them to fit her but finally he let the crazy lady have her way. $8/each and they’re soft, so good bargain IMHO.

So I looked up on the internets how to make the t’shirt into a dress and came across this great instructable tutorial on the matter. I followed it to the best of my rather suspect sewing abilities and produced a fairly decent dress for Tabby. Bolstered my some sewing success (this is rare for me) I decided to dig out an old t’shirt of mine from our “t’shirt quilt” (that I will never actually get around to making) box of discarded shirts and make her a second dress. This one had a much larger logo that would have been cut off by the previous method, so I made a modification. My interpretations for both follow.

Continue reading “Tshirt Dresses”

Super Hero Shirts

I have happily made my kids (and my best friend’s kids) ornaments the past two Christmases. This Christmas, I had a SNAFU with the paint-your-own pottery place and it didn’t happen.

Luckily, I thought of a different fun thing to make for the kids: Super Hero Shirts! Piecing together info from tutorials on APPLIQUE (hate that word – sounds boring and stodgy), I came up what I think are some pretty cute t’shirts.

I might write a tutorial after a while, but here’s the jist. You iron on some heat ‘n’ bond to the back of some scrap fabric. You cut out shapes/letters, etc. and then you bond those to your t’shirt wherever you like them. Then using whatever stitch works for you, you sew around the edges. Each shirt took me about 30 minutes and I am in LOVE with them (and the kids who wear them).

Napkins!

A few months ago, I purchased some cloth napkins on Etsy. They’re pretty, simple things in a variety of nice patterns. I do a lot of laundry anyhow and so tossing these in the wash as we go about our daily business is never a problem. The only problem was that we ran out of them fairly quickly.

Though I thought them a good value from the Etsy seller, I wanted to try to make some of my own. The original ones I got had a nice little rolled hem and so I tried to duplicate this on my own machine. But I didn’t have a ton of luck. I could get it started and sometimes even sew for a while, but inevitably, I’d pull in too much fabric or not enough and the seam would go all over the place. It was not very nice looking.

So I decided to just do my own thing and double-roll over the edges about 1/4″, press and sew. This created a much nicer finished product and not nearly so much swearing. The results are quite pretty. Tabby was particularly happy with the ones I made from fabric she picked out (pink swirls).